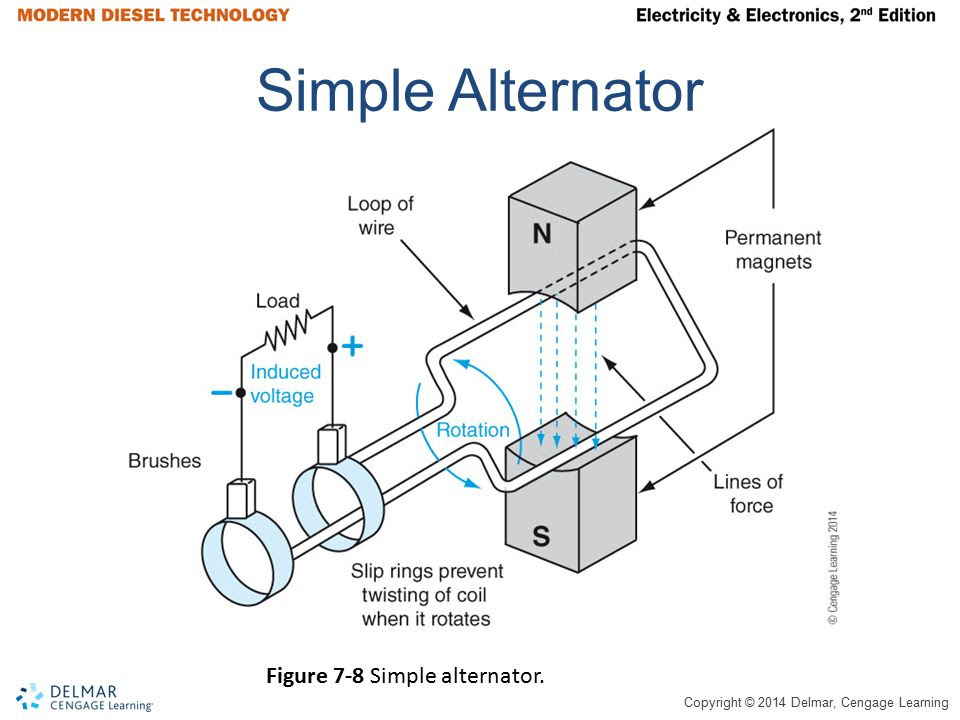
A simple alternator wiring diagram outlines the electrical connections between an alternator and other components in an electrical system, typically in a vehicle. It provides a visual representation of the alternator’s charging circuit, including the battery, voltage regulator, and associated wiring. This diagram guides the proper installation and troubleshooting of alternator systems, ensuring efficient power generation and distribution.
The alternator’s primary function is to convert mechanical energy from the engine into electrical energy to charge the battery and power electrical components. Proper alternator wiring is crucial for maintaining a stable electrical system. Benefits include improved performance, longer battery life, enhanced reliability, and reduced risk of electrical issues. A key historical development in alternator wiring was the introduction of voltage regulators, which optimize the alternator’s output voltage to prevent overcharging or undercharging.
This article delves into the essential components, wiring techniques, safety considerations, and common troubleshooting scenarios for simple alternator wiring diagrams, providing a comprehensive guide for professionals and DIY enthusiasts alike.
The key aspects of a simple alternator wiring diagram are crucial for understanding its functionality and ensuring proper installation and troubleshooting. These aspects encompass various dimensions related to the diagram’s components, connections, and purpose.
- Components: Alternator, battery, voltage regulator, wiring harness
- Connections: Positive and negative terminals, voltage sense wire
- Diagram representation: Schematic layout of components and connections
- Charging circuit: Path for current flow from alternator to battery
- Voltage regulation: Control of alternator output voltage to prevent over/undercharging
- Troubleshooting: Diagnostic tool for identifying and resolving charging system issues
- Safety considerations: Proper grounding, insulation, and protection against electrical hazards
- DIY applications: Empowering individuals to maintain and repair their vehicles
- Professional applications: Essential for automotive technicians and electrical engineers
- Historical context: Evolution of alternator wiring diagrams over time
These key aspects provide a comprehensive understanding of simple alternator wiring diagrams, enabling effective electrical system maintenance and troubleshooting. They highlight the importance of proper connections, accurate voltage regulation, and adherence to safety guidelines. Whether for DIY enthusiasts or professionals, a thorough grasp of these aspects is essential for ensuring reliable and efficient alternator performance.
Components
In a simple alternator wiring diagram, the alternator, battery, voltage regulator, and wiring harness play interconnected roles in generating, storing, and distributing electrical power. The alternator, driven by the engine, converts mechanical energy into alternating current (AC) electricity. This AC current is then rectified by the voltage regulator, which converts it into direct current (DC) and controls the output voltage to prevent overcharging or undercharging of the battery.
The battery stores the DC electrical energy generated by the alternator and supplies power to the vehicle’s electrical components when the engine is not running. The wiring harness provides the electrical connections between the alternator, battery, voltage regulator, and other electrical components, allowing current to flow and power the vehicle’s systems.
Understanding the relationship between these components is crucial for troubleshooting and maintaining a functional charging system. For example, if the alternator is not generating sufficient power, it could be due to a faulty alternator, a loose connection in the wiring harness, or a malfunctioning voltage regulator. Similarly, if the battery is not charging properly, it could be due to a faulty battery, a problem with the alternator, or a wiring issue.
In summary, the components of a simple alternator wiring diagram work together to ensure that the vehicle’s electrical system has a reliable source of power. Proper understanding and maintenance of these components are essential for the smooth operation of the vehicle.
Connections
Connections play a vital role in the proper functioning of a simple alternator wiring diagram. These connections include positive and negative terminals, as well as a voltage sense wire, and they ensure the proper flow of electrical current throughout the charging system.
- Positive terminal: The positive terminal of the alternator is connected to the positive terminal of the battery via a heavy-duty cable. This connection allows current to flow from the alternator to the battery, charging it and providing power to the vehicle’s electrical systems.
- Negative terminal: The negative terminal of the alternator is connected to the negative terminal of the battery, completing the electrical circuit and providing a path for current to return to the alternator.
- Voltage sense wire: The voltage sense wire is connected to the voltage regulator and the positive terminal of the battery. It allows the voltage regulator to monitor the battery’s voltage and adjust the alternator’s output accordingly, ensuring that the battery receives the correct charging voltage.
Proper connections are essential for the alternator to function correctly and charge the battery. Loose or corroded connections can lead to a variety of problems, including reduced charging output, flickering lights, and even a dead battery. It is important to ensure that all connections are clean, tight, and free of corrosion to ensure the proper operation of the charging system.
Diagram representation
In the context of “Simple Alternator Wiring Diagram,” diagram representation plays a pivotal role in visualizing and comprehending the electrical connections between the alternator, battery, voltage regulator, and associated wiring. This schematic layout provides a clear understanding of how these components interact to generate, store, and distribute electrical power in a vehicle’s electrical system.
- Circuit layout: The diagram depicts the flow of electrical current through the alternator, battery, voltage regulator, and wiring harness, allowing for easy identification of the charging circuit and its components.
- Component identification: Each component in the diagram is clearly labeled and represented by a standardized symbol, making it easy to identify and understand the function of each part.
- Connection points: The diagram shows the specific connection points between components, including positive and negative terminals, as well as the voltage sense wire, ensuring proper installation and troubleshooting.
- Troubleshooting aid: By visually representing the connections between components, the diagram serves as a valuable tool for troubleshooting charging system issues, such as open circuits or faulty connections.
Overall, the schematic layout of components and connections in a simple alternator wiring diagram provides a comprehensive visual representation of the charging system, enabling proper installation, maintenance, and troubleshooting of the electrical system in vehicles.
Charging circuit
Within the context of “Simple Alternator Wiring Diagram,” the charging circuit plays a central role in understanding how electrical power is generated, stored, and distributed in a vehicle’s electrical system. The charging circuit provides the path for current flow from the alternator to the battery, ensuring that the battery is charged and the electrical components of the vehicle have a reliable source of power.
- Alternator: The alternator is a crucial component of the charging circuit, responsible for converting mechanical energy from the engine into alternating current (AC) electricity.
- Voltage regulator: The voltage regulator is responsible for controlling the alternator’s output voltage, ensuring that the battery receives the correct charging voltage and preventing overcharging or undercharging.
- Battery: The battery stores the electrical energy generated by the alternator and supplies power to the vehicle’s electrical components when the engine is not running.
- Wiring harness: The wiring harness provides the electrical connections between the alternator, battery, voltage regulator, and other electrical components, allowing current to flow and power the vehicle’s systems.
The charging circuit is essential for the proper functioning of a vehicle’s electrical system. By understanding the components and connections involved in the charging circuit, individuals can effectively troubleshoot and maintain their vehicle’s electrical systems, ensuring reliable performance and longevity.
Voltage regulation
Within the context of “Simple Alternator Wiring Diagram,” voltage regulation plays a crucial role in ensuring the proper functioning of the charging system. The voltage regulator is responsible for controlling the alternator’s output voltage, preventing overcharging or undercharging of the battery. This is critical because overcharging can damage the battery, while undercharging can lead to insufficient power for the vehicle’s electrical components.
In a simple alternator wiring diagram, the voltage regulator is connected to the alternator and the battery. It monitors the battery’s voltage and adjusts the alternator’s output accordingly. When the battery is low, the voltage regulator increases the alternator’s output voltage to charge the battery. As the battery reaches its full charge, the voltage regulator reduces the alternator’s output voltage to prevent overcharging.
Real-life examples of voltage regulation in action include:
- When you start your car, the alternator’s output voltage is increased to quickly charge the battery.
- As you drive, the alternator’s output voltage is regulated to maintain a steady charging voltage for the battery and power the vehicle’s electrical components.
- If the battery becomes discharged, such as when you leave your headlights on overnight, the alternator’s output voltage will increase to charge the battery more quickly.
Understanding voltage regulation and its role in simple alternator wiring diagrams is essential for proper maintenance and troubleshooting of vehicle electrical systems. By ensuring that the voltage regulator is functioning correctly, you can prevent damage to the battery and ensure that your vehicle’s electrical components have a reliable source of power.
Troubleshooting
Within the context of “Simple Alternator Wiring Diagram,” troubleshooting plays a vital role in diagnosing and resolving issues within the vehicle’s charging system. By understanding the components and connections involved, individuals can effectively troubleshoot and maintain their vehicle’s electrical systems, ensuring reliable performance and longevity.
- Identifying potential problems: A simple alternator wiring diagram provides a visual representation of the charging system, allowing individuals to identify potential problems with the alternator, battery, voltage regulator, or wiring harness.
- Real-life examples: Troubleshooting is essential when dealing with various charging system issues, such as a dead battery, flickering lights, or an illuminated battery warning light on the dashboard.
- Implications for maintenance: By understanding how to troubleshoot the charging system using a simple alternator wiring diagram, individuals can perform routine maintenance tasks, such as cleaning connections or replacing faulty components, to prevent more severe issues down the road.
- DIY vs. professional help: Simple alternator wiring diagrams empower individuals to troubleshoot and resolve basic charging system issues themselves. However, for more complex problems, seeking professional help from a qualified mechanic is recommended.
Overall, troubleshooting using a simple alternator wiring diagram is a valuable skill for vehicle owners, as it enables them to diagnose and resolve charging system issues, ensuring the proper functioning and reliability of their vehicle’s electrical system.
Safety considerations
When working with electrical systems, safety should always be a top priority. This is especially true when dealing with alternator wiring diagrams, as there are potential electrical hazards that need to be considered. Proper grounding, insulation, and protection are crucial to ensure a safe and reliable electrical system.
- Proper grounding: Grounding provides a safe path for electrical current to flow back to the source. In an alternator wiring diagram, the alternator, battery, and voltage regulator must all be properly grounded to prevent electrical shocks or damage to components.
- Insulation: Insulation is used to cover electrical wires and components to prevent electrical current from escaping. This helps to protect against short circuits and electrical fires.
- Protection against electrical hazards: Fuses and circuit breakers are used to protect electrical circuits from overloads and short circuits. These devices can quickly interrupt the flow of electrical current to prevent damage to components or injury to personnel.
By following proper safety considerations, such as proper grounding, insulation, and protection, you can help to ensure that your alternator wiring diagram is safe and reliable. This will help to prevent electrical hazards and ensure that your vehicle’s electrical system operates properly.
DIY applications
The simple alternator wiring diagram plays a pivotal role in empowering individuals to maintain and repair their vehicles. It provides a clear and concise visual representation of the electrical connections between the alternator, battery, voltage regulator, and wiring harness, making it accessible for individuals with varying levels of electrical knowledge to understand and troubleshoot charging system issues.
Real-life examples of DIY applications using simple alternator wiring diagrams include:
- Diagnosing a faulty alternator by checking for voltage output and continuity.
- Replacing a worn-out voltage regulator to prevent overcharging or undercharging of the battery.
- Upgrading the alternator to increase charging capacity for additional electrical accessories.
Understanding simple alternator wiring diagrams enables individuals to perform these tasks safely and effectively, saving time and money compared to relying solely on professional mechanics. It fosters a sense of self-reliance and empowerment, encouraging individuals to take ownership of their vehicle’s maintenance and repairs.
Furthermore, the ability to interpret and troubleshoot alternator wiring diagrams has broader practical applications beyond automotive repairs. It enhances an individual’s overall electrical troubleshooting skills, which can be valuable in various household and industrial settings. By understanding the fundamental principles of electrical circuits and connections, individuals become better equipped to handle electrical issues safely and confidently.
Professional applications
Within the realm of simple alternator wiring diagrams, professional applications play a critical role in ensuring the proper functioning and maintenance of automotive electrical systems. Automotive technicians and electrical engineers rely heavily on these diagrams to diagnose, troubleshoot, and repair alternator-related issues.
A simple alternator wiring diagram provides a clear and concise visual representation of the electrical connections between the alternator, battery, voltage regulator, and wiring harness. This diagram serves as a roadmap for professionals to trace electrical circuits, identify faulty components, and determine the root cause of charging system problems.
Real-life examples of professional applications within simple alternator wiring diagrams include:
- Automotive technicians using wiring diagrams to diagnose a faulty alternator by measuring voltage output and continuity.
- Electrical engineers designing and implementing alternator wiring systems for optimal performance and efficiency.
- Technicians troubleshooting complex charging system issues by analyzing wiring diagrams to identify potential points of failure.
The practical applications of understanding simple alternator wiring diagrams extend beyond troubleshooting and repair. It empowers professionals to:
- Design and modify electrical systems to meet specific requirements.
- Develop and implement new technologies for alternator systems and charging circuits.
- Train and educate apprentices and students about the fundamentals of alternator wiring.
In summary, simple alternator wiring diagrams are essential tools for professional automotive technicians and electrical engineers. These diagrams provide a systematic approach to understanding, diagnosing, and resolving alternator-related issues, ensuring the reliable operation of vehicle electrical systems.
Historical context
Understanding the historical context of alternator wiring diagrams is essential for appreciating their significance in the development of electrical systems in vehicles. Over time, alternator wiring diagrams have evolved in tandem with advancements in automotive technology, reflecting changes in alternator designs, voltage regulation techniques, and the increasing complexity of electrical systems.
- Early alternator wiring diagrams: Early alternator wiring diagrams were relatively simple, reflecting the basic design of alternators at the time. They typically included the alternator, battery, voltage regulator, and a few essential connections.
- Introduction of solid-state voltage regulators: The introduction of solid-state voltage regulators in the 1960s marked a significant advancement in alternator wiring diagrams. These regulators provided more precise voltage control, leading to improved charging efficiency and reduced maintenance.
- Integration of additional components: As electrical systems in vehicles became more complex, alternator wiring diagrams incorporated additional components, such as warning lights, relays, and diodes. These components enhanced the functionality and reliability of the charging system.
- Computerized engine management systems: The advent of computerized engine management systems in the 1980s had a major impact on alternator wiring diagrams. These systems allowed for more sophisticated control of the alternator’s output, optimizing charging performance and fuel efficiency.
The evolution of alternator wiring diagrams over time has been driven by the need for more efficient, reliable, and sophisticated charging systems. By understanding the historical context of these diagrams, we gain a deeper appreciation for the technological advancements that have shaped the automotive industry.


![[2 Wire, 3 Wire, and 4 Wire] Alternator Wiring Diagram Drill and Driver](https://i0.wp.com/www.drillanddriver.com/wp-content/uploads/2022/12/How-Does-An-Alternator-work.png?w=665&ssl=1)


Related Posts


