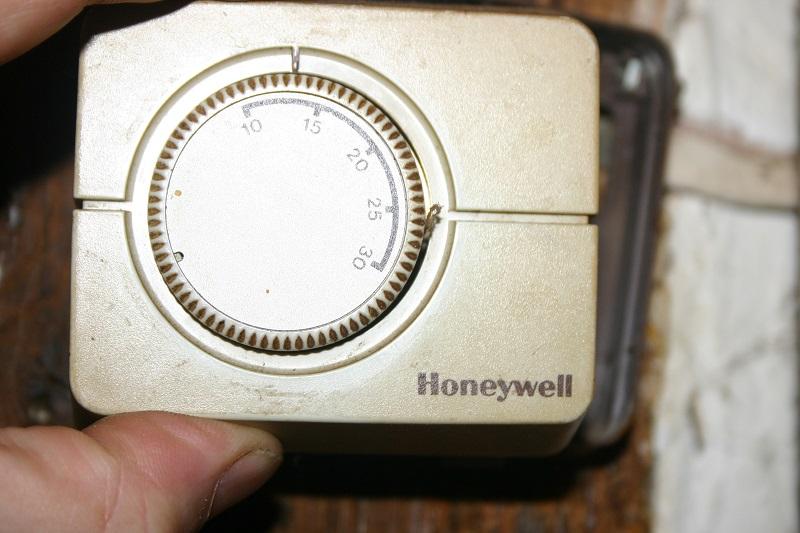
Old Honeywell Thermostat Wiring refers to the electrical wiring system used in older Honeywell thermostats. An example includes the Honeywell TH6110D1006 programmable thermostat, which uses a four-wire system (R, Y, G, W) and a jumper wire between the R and RC terminals.
This standard wiring system is widely applicable and offers benefits like compatibility with various HVAC systems, ease of installation, and cost-effectiveness. A significant historical development that contributed to its widespread adoption was the standardization of thermostat wiring conventions by the industry in the late 20th century.
This article delves into the technical aspects, compatibility, and troubleshooting approaches related to old Honeywell thermostat wiring, providing comprehensive guidance for professionals and homeowners alike.
Understanding the essential aspects of Old Honeywell Thermostat Wiring is crucial for effective installation, maintenance, and troubleshooting. These aspects encompass various dimensions, including compatibility, wiring configurations, and historical context, among others.
- Compatibility: Compatibility with different HVAC systems.
- Wiring configurations: Four or five-wire systems, jumper wires.
- Historical context: Standardization of thermostat wiring conventions.
- Voltage requirements: Typically 24 volts AC.
- Terminal identification: R, Y, G, W, C terminals.
- Troubleshooting: Common issues and diagnostic steps.
- Replacement considerations: Compatibility with existing wiring.
- Smart thermostat compatibility: Integration with modern smart home systems.
- Safety precautions: Electrical safety guidelines.
- Professional installation: Recommended for complex systems.
These aspects are interconnected and influence the overall functionality and reliability of Old Honeywell Thermostat Wiring. By delving into these details, professionals and homeowners can gain a comprehensive understanding of this essential component in HVAC systems.
Compatibility
Compatibility, in the context of Old Honeywell Thermostat Wiring, refers to the ability of the thermostat to work seamlessly with various types of HVAC (heating, ventilation, and air conditioning) systems. This compatibility is crucial as it determines the overall functionality and efficiency of the HVAC system.
Old Honeywell Thermostat Wiring typically utilizes a standardized wiring configuration, making it compatible with a wide range of HVAC systems. This includes systems such as forced-air furnaces, heat pumps, and central air conditioners. The standardized wiring ensures that the thermostat can effectively communicate with the HVAC system’s components, such as the furnace or air conditioner, to maintain desired temperature settings.
Understanding the compatibility of Old Honeywell Thermostat Wiring is essential for both professionals and homeowners. When selecting a replacement thermostat, it is imperative to ensure that it is compatible with the existing HVAC system. Compatibility issues can lead to incorrect temperature readings, malfunctioning equipment, or even safety hazards. By carefully considering compatibility, homeowners can ensure that their HVAC system operates optimally and efficiently.
Wiring configurations
Wiring configurations play a crucial role in the functionality of Old Honeywell Thermostat Wiring. These configurations determine the type of HVAC system the thermostat can control and the specific wiring connections required for proper operation. Understanding these configurations is essential for both professionals and homeowners.
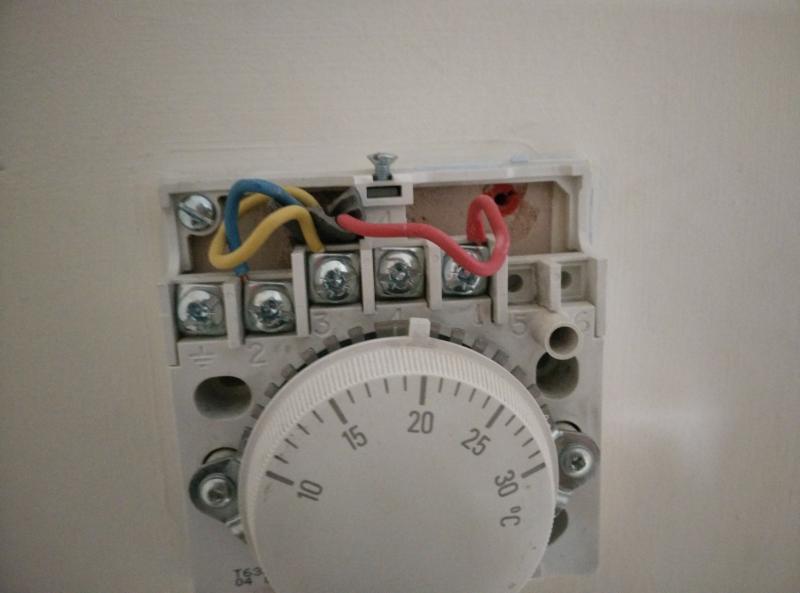
Old Honeywell Thermostat Wiring typically utilizes either a four-wire or five-wire system. The four-wire system consists of the following wires: R (power), Y (cooling), G (fan), and W (heating). The five-wire system includes an additional C wire (common), which provides continuous power to the thermostat, even when the HVAC system is off. Jumper wires are sometimes used to connect terminals within the thermostat, depending on the specific wiring configuration and the type of HVAC system being controlled.
The correct wiring configuration is critical for the proper operation of Old Honeywell Thermostat Wiring. Incorrect wiring can lead to incorrect temperature readings, malfunctioning equipment, or even safety hazards. Therefore, it is essential to carefully follow the wiring instructions provided with the thermostat and to ensure that all connections are secure.
Understanding the wiring configurations of Old Honeywell Thermostat Wiring is essential for troubleshooting and repair. By identifying the type of wiring system and the purpose of each wire, professionals and homeowners can quickly diagnose and resolve common issues. Additionally, this understanding can be applied to the installation of new thermostats, ensuring compatibility with existing wiring and the HVAC system.
Historical context
The standardization of thermostat wiring conventions played a pivotal role in the development and widespread adoption of Old Honeywell Thermostat Wiring. Prior to the establishment of these conventions, there was a lack of uniformity in the wiring configurations used by different manufacturers, leading to compatibility issues and challenges in installation and maintenance.
In the late 20th century, the industry recognized the need for standardization to ensure interoperability between thermostats and HVAC systems. This led to the development of standardized color-coding and terminal designations for thermostat wires. The R (red) wire, for example, was designated for power, the Y (yellow) wire for cooling, and the W (white) wire for heating. This standardization simplified the installation and replacement of thermostats, making it easier for professionals and homeowners to work with different brands and models.
Old Honeywell Thermostat Wiring fully embraced these standardized conventions, contributing to its widespread adoption and popularity. The consistent wiring configurations allowed Honeywell thermostats to be easily integrated into various HVAC systems, regardless of the manufacturer. This standardization also facilitated the development of universal thermostats, which could be used with multiple types of HVAC systems without the need for complex rewiring.
Understanding the historical context of thermostat wiring standardization is crucial for professionals and homeowners alike. It provides insights into the evolution of HVAC technology and the importance of standardized practices in ensuring compatibility and ease of use. This knowledge can be applied to troubleshooting, repair, and the selection of replacement thermostats, ensuring that HVAC systems operate efficiently and reliably.
Voltage requirements
In the context of Old Honeywell Thermostat Wiring, voltage requirements play a critical role in ensuring proper operation and safety. Old Honeywell thermostats are typically designed to operate on 24 volts AC (alternating current). This low voltage level is a defining characteristic of these thermostats and is essential for their safe and efficient functioning.
The 24 volts AC requirement is directly related to the internal components of Old Honeywell Thermostats. These thermostats utilize low-power electronic circuits and electromechanical relays, which are designed to operate at this specific voltage. Applying a higher voltage, such as 120 volts AC, can damage these components and create a safety hazard. Conversely, using a lower voltage may not provide sufficient power for the thermostat to operate correctly.
Real-life examples of the 24 volts AC requirement can be found in the wiring diagrams and technical specifications of Old Honeywell thermostats. The terminals on these thermostats are clearly labeled to indicate the 24 volts AC power supply connection. Additionally, the installation instructions and user manuals emphasize the importance of using a compatible power source that meets the specified voltage requirements.
Understanding the voltage requirements of Old Honeywell Thermostat Wiring is crucial for several practical applications. First, it ensures the safe and reliable operation of the thermostat. Using an incompatible voltage can lead to malfunctions, premature failure, or even electrical hazards. Second, it enables proper troubleshooting and repair. If a thermostat is not functioning correctly, verifying the voltage supply is a vital diagnostic step. Finally, it informs the selection of replacement parts and ensures compatibility with the existing wiring system.
Terminal identification
Within the context of Old Honeywell Thermostat Wiring, terminal identification plays a critical role in ensuring proper connections and functionality. The terminals, labeled R, Y, G, W, and C, serve specific purposes and require careful attention during installation and maintenance.
- Power Terminal (R): The R terminal supplies power to the thermostat. It is typically connected to the 24 volts AC power source.
- Cooling Terminal (Y): The Y terminal controls the cooling system. When the thermostat calls for cooling, it sends a signal to the air conditioner or heat pump to turn on.
- Fan Terminal (G): The G terminal controls the fan. It can be set to run continuously or only when the heating or cooling system is operating.
- Heating Terminal (W): The W terminal controls the heating system. When the thermostat calls for heat, it sends a signal to the furnace or boiler to turn on.
- Common Terminal (C): The C terminal provides a continuous power source to the thermostat, even when the heating or cooling system is off. This allows the thermostat to maintain its settings and display the correct time and temperature.
Correctly identifying and connecting the terminals is crucial for the proper operation of Old Honeywell Thermostat Wiring. Miswiring can lead to incorrect temperature readings, malfunctioning equipment, or even safety hazards. By understanding the purpose of each terminal and following the wiring instructions carefully, professionals and homeowners can ensure that their HVAC systems operate efficiently and reliably.
Troubleshooting
Within the realm of Old Honeywell Thermostat Wiring, troubleshooting is a critical aspect that empowers professionals and homeowners to identify and resolve common issues, ensuring optimal performance and comfort. Troubleshooting involves a systematic approach to diagnose and rectify problems, ranging from incorrect temperature readings to system malfunctions.
- Identifying Faulty Wiring: Miswired connections are a common culprit behind thermostat issues. Loose connections, incorrect terminal identification, and damaged wires can disrupt communication between the thermostat and the HVAC system.
- Thermostat Calibration: Inaccurate temperature readings can be attributed to thermostat miscalibration. Diagnostic steps may involve comparing the thermostat’s reading to a calibrated thermometer or adjusting the calibration settings.
- Power Supply Issues: Intermittent or insufficient power supply can cause erratic thermostat behavior. Troubleshooting steps include checking the voltage at the thermostat terminals, examining the wiring connections, and inspecting the circuit breaker or fuse associated with the HVAC system.
- Component Malfunctions: Internal components within the thermostat, such as relays, switches, or sensors, can fail over time. Diagnostic procedures may involve isolating the malfunctioning component through continuity testing or replacing suspected parts.
Troubleshooting common issues and implementing appropriate diagnostic steps are essential for maintaining a fully functional Old Honeywell Thermostat Wiring system. By understanding the potential causes of problems and following a methodical approach to resolve them, professionals and homeowners can ensure the reliable operation and energy efficiency of their HVAC systems.
Replacement considerations
When replacing an Old Honeywell Thermostat, compatibility with the existing wiring is a crucial factor to ensure a seamless transition and maintain the functionality of your HVAC system. Understanding the different aspects of compatibility can help professionals and homeowners make informed decisions during the replacement process.
- Wiring Configuration: Determine whether the replacement thermostat is compatible with the existing wiring configuration, such as four or five-wire systems. Mismatched configurations can lead to incorrect connections and system malfunctions.
- Terminal Compatibility: Verify that the terminals on the replacement thermostat align with the existing wiring. Incorrect terminal connections can cause improper communication between the thermostat and the HVAC system.
- Voltage Requirements: Ensure that the replacement thermostat operates on the same voltage as the existing wiring. Using an incompatible voltage can damage the thermostat or create safety hazards.
- System Compatibility: Consider the compatibility of the replacement thermostat with the specific HVAC system, such as forced-air furnaces, heat pumps, or central air conditioners. Incompatible thermostats may not be able to control the system effectively.
Addressing these compatibility considerations ensures that the replacement thermostat integrates seamlessly with the existing wiring and HVAC system. It prevents potential issues, maintains optimal performance, and contributes to the long-term efficiency and reliability of your home’s heating and cooling system.
Smart thermostat compatibility
With the advent of smart home technology, the integration of Old Honeywell Thermostat Wiring with modern smart home systems has opened up a new realm of possibilities for home automation and energy efficiency. This compatibility empowers homeowners to seamlessly connect their thermostats to a central hub, enabling remote access, scheduling, and integration with other smart devices.
- Remote Control and Monitoring: Smart thermostats allow for remote control of temperature settings and system status through a smartphone app or web interface. This eliminates the need for manual adjustments and provides real-time monitoring of your home’s climate.
- Scheduling and Automation: Scheduling features enable homeowners to set customized temperature profiles throughout the day or week. Automation capabilities, such as geofencing, can automatically adjust temperatures based on your location, saving energy when you’re away.
- Energy Efficiency Optimization: Integration with smart home systems allows for advanced energy monitoring and optimization. Smart thermostats can track energy consumption patterns and provide insights to help homeowners reduce their energy bills.
- Voice Control and Integration: Compatibility with virtual assistants, such as Amazon Alexa or Google Assistant, enables hands-free control of the thermostat using voice commands. Additionally, integration with other smart home devices, such as smart lighting or security systems, allows for automated interactions and enhanced home comfort.
Smart thermostat compatibility with Old Honeywell Thermostat Wiring offers a range of benefits, including convenience, energy efficiency, and enhanced home automation. By leveraging these smart features, homeowners can optimize their HVAC systems, reduce energy consumption, and create a more comfortable and connected living space.
Safety precautions
In the context of Old Honeywell Thermostat Wiring, adhering to electrical safety guidelines is paramount to prevent potential hazards and ensure the safe and reliable operation of your HVAC system. These guidelines encompass various aspects, each playing a critical role in safeguarding individuals and property.
- Qualified Electrician: Engaging a qualified electrician for installation and maintenance tasks is highly recommended. Their expertise minimizes the risk of electrical shocks, fires, or damage to the thermostat and HVAC system.
- Power Isolation: Before performing any electrical work, it is imperative to isolate the power supply to the thermostat by turning off the circuit breaker or removing the fuse associated with the system. This eliminates the risk of electrical shock during installation or troubleshooting.
- Grounding: Proper grounding of the thermostat and HVAC system is essential for safety. Grounding provides a path for electrical faults to safely dissipate, reducing the risk of electrical shocks or damage to equipment.
- Wire Inspection: Regularly inspecting the thermostat wiring for any signs of damage, such as fraying, cuts, or loose connections, is crucial. Damaged wiring can lead to electrical hazards, including fires or shocks.
By adhering to these electrical safety guidelines, homeowners and professionals can minimize the risks associated with Old Honeywell Thermostat Wiring. These precautions ensure the safe and reliable operation of HVAC systems, safeguarding individuals from electrical hazards and potential harm.
Professional installation
Old Honeywell Thermostat Wiring encompasses a range of systems, some of which may pose complexities that warrant professional installation. This recommendation stems from the intricate nature of these systems and the potential risks involved in improper handling.
-
Electrical Wiring:
Electrical wiring is a fundamental aspect of thermostat installation, and incorrect connections can lead to electrical hazards, such as fires or shocks. Professional electricians possess the expertise to ensure proper wiring and adherence to safety standards. -
System Compatibility:
Complex HVAC systems often require specific thermostat configurations to operate efficiently. Professionals can assess system compatibility and select the most suitable thermostat, ensuring seamless integration and optimal performance. -
Advanced Features:
Complex thermostats may incorporate advanced features, such as multi-stage heating or cooling, zone control, or smart home integration. Professional installation ensures these features are configured and calibrated correctly, maximizing their benefits. -
Troubleshooting and Maintenance:
Complex systems demand proper troubleshooting and maintenance to ensure longevity and efficiency. Professionals have the experience and knowledge to diagnose and resolve issues promptly, minimizing system downtime and potential damage.
In conclusion, professional installation is highly recommended for complex Old Honeywell Thermostat Wiring systems due to the potential risks and complexities involved. Engaging a qualified electrician ensures proper wiring, system compatibility, advanced feature configuration, and ongoing system maintenance, contributing to a safe, efficient, and reliable HVAC system.


Related Posts


