Light Bar Wiring describes the electrical connections and components used to power and control auxiliary lighting systems, such as LED light bars commonly installed on vehicles for enhanced visibility or off-road illumination.
Proper wiring is crucial for safe and efficient light bar operation. Benefits include improved illumination, increased safety, and a more rugged aesthetic. A key historical development was the standardization of connectors and wiring harnesses, simplifying installation and reducing the risk of electrical hazards.
This article aims to provide a comprehensive guide to light bar wiring, discussing essential components, wiring diagrams, and best practices to ensure optimal performance and safety.
Light Bar Wiring, a crucial aspect of vehicle lighting systems, encompasses various essential elements that ensure the effective and safe operation of auxiliary lighting. Understanding these aspects is paramount for proper installation and maintenance of light bars.
- Electrical Components: Relays, fuses, switches, and wiring harnesses.
- Wiring Diagrams: Visual representations of electrical connections.
- Power Source: Battery or alternator, providing electrical power.
- Grounding: Completing the electrical circuit and preventing voltage spikes.
- Switch Control: Enabling manual or automatic activation of light bars.
- Connector Types: Ensuring secure and weatherproof connections.
- Wire Gauge: Determining the appropriate wire thickness for current capacity.
- Proper Routing: Protecting wires from damage and preventing electrical interference.
- Maintenance: Inspecting and cleaning connections to ensure optimal performance.
- Safety Precautions: Following industry standards and using proper tools.
These aspects are interconnected, forming a comprehensive system. For instance, proper grounding prevents electrical hazards, while adequate wire gauge ensures efficient power transmission. Understanding these connections and adhering to best practices are crucial for a reliable and effective light bar wiring system.
Electrical Components
In the context of light bar wiring, electrical components play a crucial role in ensuring the safe and efficient operation of auxiliary lighting systems. These components work in conjunction to control the flow of electricity, protect against electrical hazards, and enable manual or automatic activation of light bars.
Relays are electromagnetic switches that control high-power electrical circuits with low-power signals. In light bar wiring, relays are used to isolate the light bar’s power draw from the vehicle’s electrical system, preventing damage to sensitive components. Fuses protect the electrical system from overcurrent conditions by breaking the circuit if the current exceeds a predetermined threshold. Switches provide manual or automatic control over the light bar’s operation, allowing the driver to activate the lights as needed.
Wiring harnesses are assemblies of wires and connectors that simplify the installation and maintenance of light bars. They provide a standardized and weatherproof connection between the light bar and the vehicle’s electrical system. Proper selection and installation of wiring harnesses are essential for ensuring reliable and safe operation.
Understanding the relationship between electrical components and light bar wiring is critical for proper installation and maintenance. By selecting the appropriate components, following best practices for wiring, and adhering to safety guidelines, installers can ensure that light bars operate effectively and safely, enhancing visibility and safety on the road.
Wiring Diagrams
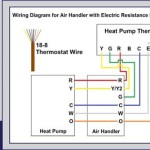
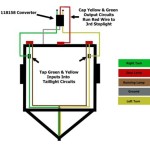
In the context of “Light Bar Wiring,” wiring diagrams serve as essential visual representations of electrical connections, providing a clear roadmap for the installation and maintenance of auxiliary lighting systems. These diagrams play a crucial role in ensuring the proper functioning and safety of light bars by detailing the connections between various electrical components and the vehicle’s electrical system.
- Components: Wiring diagrams clearly illustrate the different electrical components involved in a light bar wiring system, including relays, fuses, switches, and wiring harnesses. By identifying and understanding the function of each component, installers can ensure proper installation and troubleshoot any issues that may arise.
- Connections: Wiring diagrams provide a detailed representation of how the electrical components are connected to each other and to the vehicle’s electrical system. This information is vital for ensuring that power is supplied to the light bar safely and efficiently, preventing electrical hazards and damage to sensitive components.
- Troubleshooting: In the event of a malfunction, wiring diagrams become invaluable tools for troubleshooting. By following the visual representation of the electrical connections, installers can quickly identify potential problem areas, such as loose connections, blown fuses, or faulty components, expediting the repair process and minimizing downtime.
- Customization: Wiring diagrams also support the customization of light bar wiring systems to meet specific requirements. Whether it’s adding additional lighting accessories or integrating the light bars with other vehicle systems, wiring diagrams provide a flexible framework for tailoring the electrical connections to the desired functionality.
In summary, wiring diagrams are indispensable tools in the context of “Light Bar Wiring.” They provide a comprehensive visual representation of electrical connections, enabling installers to understand, troubleshoot, and customize lighting systems effectively. By adhering to these diagrams and following industry best practices, installers can ensure the safe and reliable operation of auxiliary lighting, enhancing visibility and safety on the road.
Power Source
In the context of “Light Bar Wiring,” the power source plays a critical role in ensuring the proper functioning and safety of auxiliary lighting systems. Light bars, which enhance visibility and safety on the road, rely on a reliable and sufficient power supply to operate effectively.
The primary power sources for light bar wiring are the vehicle’s battery and alternator. The battery provides power when the engine is off, while the alternator takes over when the engine is running. Both components work together to ensure that the light bars have a consistent and adequate power supply.
For proper light bar wiring, selecting the appropriate power source is crucial. The battery’s capacity and the alternator’s output should be carefully considered to meet the power requirements of the light bar system. Insufficient power can lead to dim lighting or even system failure, while excessive power can strain the electrical system and potentially damage components.
Real-life examples of “Power Source: Battery or alternator, providing electrical power” within “Light Bar Wiring” include powering LED light bars for off-road vehicles, auxiliary lighting for emergency response vehicles, and additional lighting for commercial trucks. In these applications, a reliable power source is essential to ensure uninterrupted operation of the light bars.
Understanding the connection between “Power Source: Battery or alternator, providing electrical power” and “Light Bar Wiring” is crucial for installers and users alike. Proper selection and installation of the power source ensure that light bars operate at their optimal performance, providing enhanced visibility and safety on the road.
Grounding
Grounding, a crucial component of “Light Bar Wiring,” plays a vital role in completing the electrical circuit and preventing voltage spikes. Without proper grounding, the electrical system can become unstable, leading to potential damage to light bars and other electrical components.
In “Light Bar Wiring,” grounding provides a low-resistance path for electrical current to return to the vehicle’s battery, completing the circuit. This prevents voltage spikes and ensures that the light bars receive a consistent power supply. Voltage spikes, if left unchecked, can cause premature failure of light bars and other sensitive electronic devices.
Real-life examples of “Grounding: Completing the electrical circuit and preventing voltage spikes” within “Light Bar Wiring” include:
- Grounding the light bar directly to the vehicle’s chassis or frame, providing a solid and low-resistance path for electrical current to flow.
- Proper grounding of the light bar’s mounting bracket, ensuring a secure connection to the vehicle’s body and minimizing potential voltage spikes.
- Using anti-static straps or grounding cables to prevent static electricity buildup and potential voltage spikes that could damage the light bars.
Understanding the connection between “Grounding: Completing the electrical circuit and preventing voltage spikes” and “Light Bar Wiring” is critical for ensuring the proper functioning and longevity of auxiliary lighting systems. By implementing proper grounding techniques, installers and users can mitigate voltage spikes, enhance electrical stability, and extend the lifespan of light bars and other electrical components.
Switch Control
In the context of “Light Bar Wiring,” switch control plays a fundamental role in enabling manual or automatic activation of light bars, providing drivers with convenient and precise control over their auxiliary lighting systems. Switch control establishes a direct connection between the driver and the light bars, allowing for quick and effortless illumination adjustments.
As a critical component of “Light Bar Wiring,” switch control offers several key advantages. Manual switches provide drivers with direct control over the light bars, allowing them to turn them on or off as needed. This level of control is particularly useful in situations where momentary or intermittent lighting is required, such as when navigating off-road trails or signaling other vehicles. Automatic switches, on the other hand, offer convenience and automation by linking the light bars to specific events or conditions. For instance, light bars can be wired to activate automatically when the vehicle’s high beams are engaged, providing additional illumination without manual intervention.
Real-life examples of “Switch Control: Enabling manual or automatic activation of light bars” within “Light Bar Wiring” include:
Installing a toggle switch on the dashboard to manually control the light bars, allowing the driver to turn them on or off with a simple flick of the switch. Wiring the light bars to an automatic switch connected to the vehicle’s ignition system, ensuring that the light bars turn on automatically when the vehicle is started. Integrating the light bars with a light controller that enables advanced control features, such as dimming, flashing, or synchronization with other vehicle lighting systems.
Understanding the connection between “Switch Control: Enabling manual or automatic activation of light bars.” and “Light Bar Wiring” is essential for installers and users alike. Proper implementation of switch control ensures that light bars can be operated safely, conveniently, and in accordance with the driver’s preferences. By tailoring the switch control to the specific application, users can optimize the functionality and effectiveness of their auxiliary lighting systems.
Connector Types
In the context of “Light Bar Wiring”, connector types play a crucial role in ensuring secure and weatherproof connections between various electrical components, such as light bars, wiring harnesses, and switches. Proper selection and installation of connectors are essential to maintain reliable electrical performance and prevent potential hazards.
- Waterproof Connectors: Designed to withstand moisture and harsh environmental conditions, these connectors form a watertight seal around the connection, preventing corrosion and ensuring reliable operation even in wet or dusty environments.
- Sealed Connectors: Similar to waterproof connectors, sealed connectors provide protection against moisture and contaminants. They are typically used in less demanding applications where complete submersion is not expected.
- Locking Connectors: Incorporating a locking mechanism, these connectors prevent accidental disconnections due to vibrations or rough handling. They are ideal for applications where secure connections are critical, such as off-road vehicles or marine environments.
- Quick-Disconnect Connectors: Designed for easy and rapid connection and disconnection, these connectors allow for quick removal of light bars or other accessories without the need for tools. They are commonly used in applications where frequent disconnections are required, such as temporary lighting setups or diagnostic purposes.
Choosing the appropriate connector type for “Light Bar Wiring” depends on the specific application and environmental conditions. Waterproof connectors are essential for outdoor installations exposed to rain or moisture, while sealed connectors offer adequate protection for less demanding environments. Locking connectors ensure secure connections in harsh conditions, and quick-disconnect connectors provide convenience and flexibility. By selecting and installing the correct connector types, installers can ensure the reliability, longevity, and safety of their light bar wiring systems.
Wire Gauge
When considering “Light Bar Wiring”, determining the appropriate wire gauge is crucial for ensuring the safe and efficient operation of auxiliary lighting systems. Wire gauge, measured in American Wire Gauge (AWG), directly relates to the thickness of the wire and its ability to carry electrical current. Selecting the correct wire gauge is essential to prevent overheating, voltage drop, and potential electrical hazards.
- Current Capacity: The primary factor in determining wire gauge is the amount of electrical current the wire will carry. High-powered light bars require thicker gauge wire to handle the increased current flow.
- Wire Length: Longer wires experience greater resistance, which can lead to voltage drop. Using a thicker gauge wire for longer runs compensates for this resistance, ensuring adequate voltage at the light bar.
- Environmental Conditions: Extreme temperatures, moisture, and corrosive elements can affect wire performance. Using thicker gauge wire or employing protective measures, such as heat-resistant insulation or conduit, ensures reliability in harsh environments.
- Circuit Protection: Oversized wire gauge provides an additional margin of safety by reducing the risk of overheating and potential electrical fires. This is especially important for high-wattage light bars that draw significant current.
Understanding the relationship between “Wire Gauge: Determining the appropriate wire thickness for current capacity” and “Light Bar Wiring” enables installers to make informed decisions when selecting and installing wiring components. By choosing the correct wire gauge and following best practices, they can ensure that light bars operate safely, efficiently, and in accordance with industry standards.
Proper Routing
In the context of “Light Bar Wiring”, proper routing plays a critical role in ensuring the longevity and reliability of auxiliary lighting systems. By strategically positioning wires, installers can minimize the risk of damage, prevent electrical interference, and maintain optimal performance.
- Conduit Protection: Using protective conduits or sheathing safeguards wires from abrasion, moisture, and extreme temperatures. This is particularly important in harsh environments or when wires are exposed to moving parts.
- Strain Relief: Implementing strain relief measures, such as cable ties or clamps, prevents excessive stress on wire connections. This reduces the risk of wire breakage or damage due to vibration or movement.
- Distance from Heat Sources: Routing wires away from heat-generating components, such as engines or exhaust systems, minimizes the risk of insulation damage and potential electrical hazards.
- Avoiding Electrical Interference: Keeping signal wires, such as those for LED control or dimming, separate from power wires helps prevent electromagnetic interference and ensures reliable signal transmission.
By adhering to proper routing techniques, installers can ensure that “Light Bar Wiring” is protected against damage, electrical interference, and premature failure. This not only enhances the longevity and reliability of auxiliary lighting systems but also contributes to overall vehicle safety and performance.
Maintenance
In the context of “Light Bar Wiring,” regular maintenance is crucial to ensure the long-term reliability and performance of auxiliary lighting systems. This includes inspecting and cleaning electrical connections to prevent corrosion, reduce resistance, and maintain optimal current flow.
- Connection Inspection: Regularly checking all connections for signs of loose wires, corrosion, or damage. This proactive approach can identify potential issues before they lead to performance degradation or electrical faults.
- Terminal Cleaning: Using a wire brush or electrical contact cleaner to remove oxidation and buildup from terminals. Clean terminals ensure good electrical contact, minimize resistance, and prevent overheating.
- Moisture Prevention: Inspecting connections for moisture intrusion and applying dielectric grease or other protective measures to prevent corrosion and ensure reliable operation in wet conditions.
- Ground Connection Maintenance: Ensuring a clean and secure ground connection is vital for proper circuit completion and preventing voltage spikes. Inspecting and cleaning the ground connection regularly helps maintain a low-resistance path for electrical current.
By incorporating these maintenance practices into their routines, installers and users can extend the lifespan of “Light Bar Wiring” systems, minimize the risk of electrical problems, and ensure that auxiliary lighting systems operate at their peak performance when needed most.
Safety Precautions
In the context of “Light Bar Wiring,” prioritizing safety precautions is paramount to ensure the proper installation, operation, and maintenance of auxiliary lighting systems. Following established industry standards and utilizing the appropriate tools are crucial aspects that contribute to the overall safety and effectiveness of these systems.
- Electrical Safety: Adhering to industry standards and using insulated tools helps prevent electrical shocks, short circuits, and fires. Proper grounding techniques and circuit protection measures ensure safe operation.
- Wire Management: Using proper routing techniques, securing wires with cable ties, and avoiding sharp bends minimizes the risk of damage to the wiring harness, preventing electrical faults and ensuring reliable performance.
- Environmental Protection: Employing weatherproof connectors, sealing entry points, and using corrosion-resistant materials protects the wiring system from moisture, dust, and other environmental factors that could compromise its integrity.
- Regular Maintenance: Periodically inspecting connections, checking for loose wires or damage, and performing routine maintenance helps identify potential issues early on, preventing failures and ensuring optimal performance.
By embracing these safety precautions, installers and users can mitigate potential hazards, extend the lifespan of their “Light Bar Wiring” systems, and ensure that these systems operate reliably and safely, enhancing visibility and overall driving safety.


Related Posts


