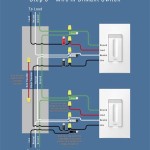
A humbucker wiring diagram illustrates the electrical connections within a humbucker pickup, a type of guitar pickup known for its distinctive, hum-canceling sound. A common example is the Gibson 490R and 498T wiring diagram, which provides detailed instructions on how to connect the pickup’s coils, magnets, and other components together.
Understanding humbucker wiring diagrams is crucial for guitarists, as it enables them to customize and repair their pickups, optimizing the tone and performance of their instruments. This knowledge also provides insights into the historical development of the humbucker, originally invented by Seth Lover in 1955 to eliminate the electromagnetic interference (hum) common in single-coil pickups.
In the following sections, we will delve deeper into the wiring diagrams of humbucker pickups, exploring their components, connection methods, and how they contribute to the unique sound and versatility of these essential guitar components.
Understanding the essential aspects of humbucker wiring diagrams is crucial for guitarists and luthiers seeking to optimize the tone and performance of their instruments. These diagrams provide detailed instructions on how to connect the pickup’s coils, magnets, and other components, enabling customization and repair.
- Components: Coils, magnets, wiring, capacitors
- Connections: Series, parallel, split
- Polarity: North and south poles
- Phasing: In-phase and out-of-phase
- Grounding: Shielding and noise reduction
- Wiring Options: Single-conductor, two-conductor, four-conductor
- Pickup Types: Humbucker, P-90, single-coil
- Troubleshooting: Identifying and fixing common issues
- Customizations: Tailoring the sound and performance
These aspects are interconnected and influence the overall sound and functionality of the humbucker pickup. By understanding the wiring diagram, guitarists can experiment with different connections and modifications to achieve their desired tone and playing style. For instance, series wiring provides a thicker, more powerful sound, while parallel wiring offers a brighter, more articulate tone. Splitting the coils can create a single-coil sound, expanding the tonal versatility of the humbucker.
Components
Understanding the components of a humbucker pickup is essential for deciphering wiring diagrams and customizing the pickup’s sound. The primary components include coils, magnets, wiring, and capacitors, each playing a crucial role in generating and shaping the pickup’s tone.
- Coils: The heart of the humbucker, coils are wound with copper wire around a magnetic core. The number of turns, wire gauge, and winding pattern influence the pickup’s inductance, resistance, and overall tone.
- Magnets: Humbuckers typically use two magnets, one north and one south, to create a magnetic field. The strength and orientation of the magnets affect the pickup’s output level, clarity, and sustain.
- Wiring: The way the coils are wired together determines the pickup’s sound and functionality. Series wiring provides a thicker, more powerful sound, while parallel wiring offers a brighter, more articulate tone. Splitting the coils can create a single-coil sound, expanding the tonal versatility of the humbucker.
- Capacitors: Capacitors are used to filter out high frequencies, reducing unwanted noise and shaping the pickup’s overall tone. The value of the capacitor affects the cutoff frequency, with higher values resulting in a warmer, smoother sound.
These components interact with each other to produce the characteristic hum-canceling sound of a humbucker pickup. By understanding the wiring diagram and experimenting with different components and connections, guitarists can tailor the sound and performance of their humbuckers to suit their playing style and musical preferences.
Connections
In the context of humbucker wiring diagrams, the type of connection used between the coils has a significant impact on the pickup’s sound and functionality. The three main connection types are series, parallel, and split.
Series wiring connects the coils in a sequential loop, resulting in a thicker, more powerful sound with increased output and inductance. This connection is commonly used for heavy rock and metal genres where a strong, aggressive tone is desired. Parallel wiring, on the other hand, connects the coils in a parallel circuit, producing a brighter, more articulate sound with reduced output and inductance. This connection is often preferred for cleaner tones and genres such as blues, jazz, and funk.
Splitting the coils involves disconnecting one of the coils from the circuit, effectively creating a single-coil pickup. This provides a brighter, twangier sound that is reminiscent of traditional single-coil pickups. Splitting the coils is a versatile option that expands the tonal range of a humbucker, allowing guitarists to access both humbucking and single-coil sounds from a single pickup.
Understanding the relationship between connections and humbucker wiring diagrams is crucial for guitarists who wish to customize the sound and performance of their instruments. By experimenting with different connection types, guitarists can tailor their humbuckers to suit their playing style and musical preferences.
Polarity
In the context of humbucker wiring diagrams, polarity refers to the magnetic orientation of the pickup’s magnets. The north and south poles of the magnets play a crucial role in determining the pickup’s sound and functionality, particularly its ability to cancel hum.
When two coils are wound in the same direction and have the same polarity, they are said to be in-phase. In this configuration, the magnetic fields produced by the coils reinforce each other, resulting in a stronger output signal. However, this configuration also allows for electromagnetic interference (EMI) to be induced into the coils, causing unwanted hum and noise.
To cancel hum, humbucker pickups use two coils with opposite polarity. The coils are wired in series, but the polarity of one coil is reversed. This means that the magnetic fields produced by the coils oppose each other, canceling out the EMI. The result is a significant reduction in hum, while still maintaining a strong output signal.
Understanding the relationship between polarity and humbucker wiring diagrams is essential for ensuring proper pickup operation and achieving the desired sound. By carefully following the wiring diagram and paying attention to the polarity of the magnets, guitarists can build humbuckers that are free from hum and produce a clear, powerful tone.
Phasing
Phasing, in the context of humbucker wiring diagrams, refers to the relationship between the magnetic polarities and winding directions of the two coils within the pickup. When the coils are wound in the same direction and have the same polarity, they are said to be in-phase. Conversely, when the coils are wound in opposite directions or have opposite polarities, they are said to be out-of-phase. The phase relationship between the coils has a significant impact on the sound and functionality of the humbucker pickup.
In-phase humbuckers produce a thicker, more powerful sound with increased output and inductance. This configuration is commonly used for heavy rock and metal genres where a strong, aggressive tone is desired. Out-of-phase humbuckers, on the other hand, produce a brighter, more articulate sound with reduced output and inductance. This configuration is often preferred for cleaner tones and genres such as blues, jazz, and funk. Additionally, out-of-phase humbuckers can create unique and interesting sounds when combined with other pickups or effects.
Understanding the relationship between phasing and humbucker wiring diagrams is essential for guitarists who wish to customize the sound and performance of their instruments. By carefully following the wiring diagram and paying attention to the phase relationship of the coils, guitarists can build humbuckers that produce the desired sound and functionality. Real-life examples of phasing in humbucker wiring diagrams can be found in popular guitar models such as the Gibson Les Paul and Fender Stratocaster.
Grounding
Grounding, shielding, and noise reduction are crucial aspects of humbucker wiring diagrams, as they contribute significantly to the pickup’s overall performance and sound quality. By understanding and implementing proper grounding techniques, guitarists can minimize unwanted noise and interference, resulting in a cleaner, more articulate tone.
- Conductive paint: A conductive paint is applied to the pickup’s baseplate and cover, creating a continuous electrical path to ground. This helps to shield the pickup from external noise sources and reduces microphonic feedback.
- Ground wire: A ground wire is soldered from the pickup’s baseplate to the guitar’s ground terminal. This provides a low-resistance path for electrical current to flow, further reducing noise and ensuring proper grounding.
- Shielding tape: Copper or aluminum tape can be applied to the inside of the guitar’s pickup cavity to create a Faraday cage. This helps to shield the pickup from electromagnetic interference (EMI) and other external noise sources.
- Star grounding: Star grounding involves connecting all of the guitar’s electrical components (such as the pickups, bridge, and pots) to a central grounding point. This helps to minimize ground loops and ensures that all components are properly grounded.
By incorporating these grounding techniques into their humbucker wiring diagrams, guitarists can significantly reduce noise and interference, resulting in a cleaner, more defined tone. Proper grounding also helps to improve the pickup’s overall performance and responsiveness, allowing guitarists to fully harness the potential of their humbuckers.
Wiring Options
Understanding the different wiring options available for humbuckers is crucial when studying humbucker wiring diagrams. These options, namely single-conductor, two-conductor, and four-conductor wiring, directly impact the pickup’s functionality, versatility, and overall sound. Choosing the appropriate wiring option is essential for achieving the desired tone and performance.
Single-conductor wiring, the most basic option, utilizes a single conductor to connect the pickup to the guitar’s electronics. This type of wiring provides a simple and straightforward installation but limits the pickup’s versatility. Two-conductor wiring employs two conductors, allowing for coil splitting, a technique that enables the pickup to operate as two separate single-coil pickups. This option offers greater tonal flexibility, making it suitable for guitarists seeking a wider range of sounds from their humbucker.
Four-conductor wiring is the most versatile option, employing four conductors to connect the pickup to the guitar’s electronics. This type of wiring allows for coil splitting, phase reversal, and other advanced wiring configurations. Four-conductor wiring is the preferred choice for guitarists who demand maximum tonal control and versatility from their humbuckers. Real-life examples of these wiring options can be found in popular guitar models such as the Gibson Les Paul and Fender Stratocaster.
In conclusion, the choice of wiring option is an integral part of humbucker wiring diagrams, influencing the pickup’s functionality, versatility, and sound. Understanding the differences between single-conductor, two-conductor, and four-conductor wiring empowers guitarists to make informed decisions when designing or modifying their humbucker setups, enabling them to achieve their desired tonal goals.
Pickup Types
Within the intricacies of “Humbucker Wiring Diagrams,” understanding the different pickup types, namely humbuckers, P-90s, and single-coils, is essential. Each pickup possesses unique characteristics that directly influence the wiring diagram’s design and the overall sound and functionality of the pickup.
- Construction: Humbuckers utilize dual coils with opposite polarity, while P-90s use a single coil with a wider aperture and single-coils have a single coil with a narrower aperture. This construction dictates the pickup’s output level, tone, and susceptibility to noise.
- Wiring: Humbuckers employ a series or parallel wiring configuration to control the coils’ interaction, whereas P-90s typically use a single-coil wiring scheme. Single-coil pickups also use a single-coil wiring configuration.
- Tonal Characteristics: Humbuckers are renowned for their thick, warm, and powerful sound with reduced noise, while P-90s offer a vintage, bluesy tone with increased clarity and bite. Single-coils provide a bright, twangy tone with a higher susceptibility to noise.
- Examples: Gibson Les Paul guitars often feature humbuckers, while Fender Stratocasters commonly use single-coils. P-90s are found on guitars like the Gibson SG and Epiphone Casino.
Comprehending the distinctions between these pickup types empowers guitarists to tailor their wiring diagrams precisely. By selecting the appropriate pickup type and wiring configuration, they can achieve the desired tonal characteristics and functionality, unlocking a wide spectrum of sonic possibilities.
Troubleshooting
Understanding the connection between “Troubleshooting: Identifying and fixing common issues” and “Humbucker Wiring Diagram” is crucial for guitarists and technicians seeking to maintain and repair their instruments. Troubleshooting involves diagnosing and resolving problems within the humbucker’s wiring, ensuring optimal performance and sound quality. The humbucker wiring diagram serves as a detailed roadmap, providing insights into the pickup’s electrical connections and components.
Common issues that may necessitate troubleshooting include: loss of output, unwanted noise or hum, and imbalances in the pickup’s response. By carefully examining the wiring diagram and systematically testing the connections, guitarists can pinpoint the root cause of these problems. For instance, a loose ground wire can lead to intermittent output, while incorrect polarity between the coils can result in excessive hum. The wiring diagram empowers individuals to identify the specific component or connection responsible for the issue, enabling targeted repairs.
Troubleshooting also plays a critical role in customizing and modifying humbuckers. Whether seeking to alter the pickup’s tone, output, or functionality, the wiring diagram provides a framework for experimenting with different connections and component values. By understanding the cause-and-effect relationships between wiring configurations and sonic outcomes, guitarists can make informed decisions to achieve their desired sound. Real-life examples include adjusting the pickup’s height or altering the value of the tone capacitor to fine-tune its frequency response.
In summary, troubleshooting is an integral aspect of humbucker wiring diagrams, empowering guitarists and technicians to maintain, repair, and customize their pickups. By understanding the relationship between wiring configurations and sonic outcomes, they can effectively diagnose and resolve common issues, unlocking the full potential of their humbuckers.
Customizations
Within the realm of “Humbucker Wiring Diagrams,” “Customizations: Tailoring the sound and performance” holds paramount importance, as it empowers guitarists to mold their instruments to their specific sonic preferences. The humbucker wiring diagram serves as a blueprint for understanding the electrical connections and components within the pickup, providing a foundation for experimentation and modification.
Customizations can range from subtle tweaks to extensive overhauls, each affecting the pickup’s output, tone, and response. By altering the wiring configuration, component values, or even the physical construction of the pickup, guitarists can achieve a vast array of sonic possibilities. For instance, changing the value of the tone capacitor can adjust the pickup’s frequency response, while altering the pickup’s height can influence its output and magnetic field interaction with the strings. Real-life examples include the popular “coil split” modification, which involves wiring the humbucker to operate as two separate single-coil pickups, expanding its tonal versatility.
Understanding the relationship between customizations and humbucker wiring diagrams allows guitarists to approach modifications with precision and intention. By carefully studying the diagram and experimenting with different configurations, they can unlock a world of tonal possibilities, tailoring their pickups to perfectly complement their playing style and musical vision. This understanding also empowers guitarists to troubleshoot and repair their pickups, ensuring optimal performance and longevity.
In summary, the connection between “Customizations: Tailoring the sound and performance” and “Humbucker Wiring Diagram” is undeniable. By leveraging the insights provided by the wiring diagram, guitarists can embark on a journey of sonic exploration, crafting pickups that are uniquely tailored to their musical needs. This understanding not only enhances their playing experience but also empowers them to maintain and repair their instruments with confidence.


Related Posts


