License Plate Light Wiring refers to the electrical system that powers the illuminating lights on the rear of a vehicle, intended to illuminate its license plate, making it clearly visible especially at night or in low-light conditions. This wiring includes components such as wires, connectors, switches, and a power source, which work together to provide electricity to the license plate light bulbs.
Having functional license plate lights is important for several reasons. They increase the visibility of the vehicle, ensuring that law enforcement and other drivers can easily read the plate for identification purposes. Additionally, they assist with vehicle safety and security, reducing the risk of rear-end collisions or theft by making the vehicle more noticeable. Historically, license plate lights were initially introduced on automobiles in the early 1900s, primarily for display and aesthetic purposes rather than for safety reasons.
However, their importance as a safety feature was recognized over time, leading to stricter regulations and improved lighting technology. Today, license plate lighting is an essential component of vehicle design, required by law in most jurisdictions.
Understanding the essential aspects of “How To Fix License Plate Light Wiring” is crucial for effectively addressing this task. These aspects encompass various dimensions, each playing a vital role in the overall process.
- Safety Regulations: Adhering to safety regulations is paramount, as license plate lights are legally required for vehicle safety and identification.
- Electrical Knowledge: Basic electrical knowledge is necessary to troubleshoot and repair wiring issues, ensuring proper functioning of the lights.
- Tools and Equipment: Having the right tools and equipment, such as a multimeter, electrical tape, and wire strippers, is essential for efficient repairs.
- Wiring Diagram: Referencing a wiring diagram specific to the vehicle model provides a clear understanding of the wiring system and simplifies troubleshooting.
- Troubleshooting Techniques: Employing systematic troubleshooting techniques, such as checking for power, ground, and continuity, helps pinpoint the exact cause of the issue.
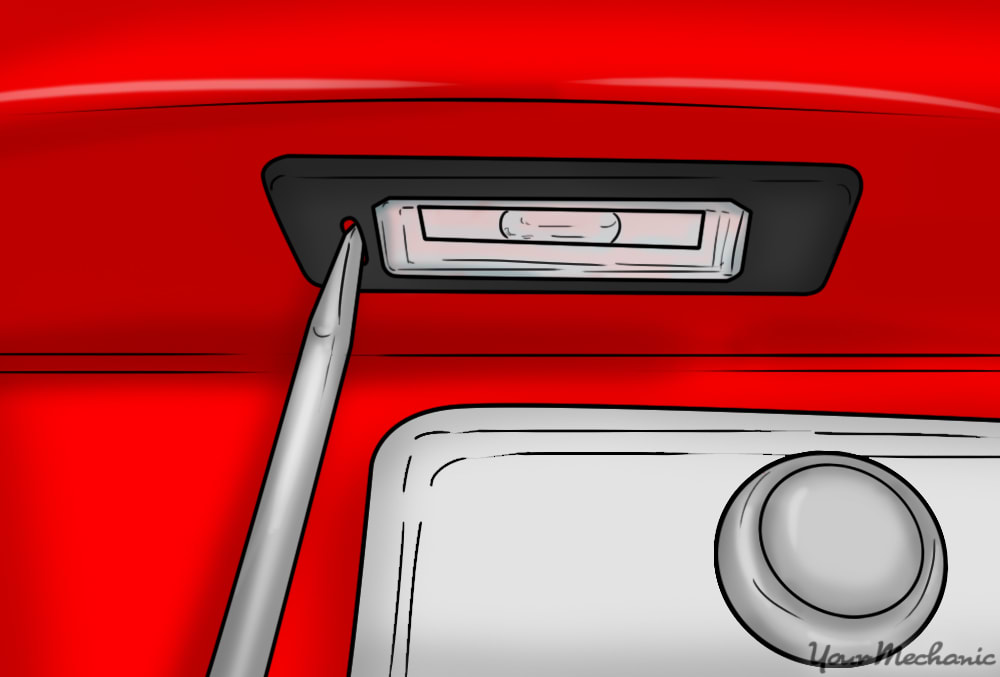
- Bulb Replacement: Knowing how to replace the license plate light bulbs is a straightforward but crucial aspect of the repair process.
- Connector Inspection: Inspecting and cleaning electrical connectors ensures proper contact and prevents corrosion-related issues.
- Grounding: Verifying and establishing a good ground connection is essential for completing the electrical circuit and ensuring the lights function properly.
These aspects are interconnected and collectively contribute to effective license plate light wiring repairs. Understanding and addressing each of these elements increases the likelihood of successful troubleshooting and restoration of proper lighting functionality.
Safety Regulations
Within the context of “How To Fix License Plate Light Wiring,” understanding and adhering to safety regulations is of utmost importance. License plate lights are not merely a convenience but a legal requirement for ensuring vehicle safety and proper identification. By fulfilling these regulations, drivers contribute to the overall safety and functionality of their vehicles on the road.
- Legal Compliance: License plate lights are mandated by law in most jurisdictions. Failing to have functioning license plate lights can result in fines, penalties, and even vehicle impoundment.
- Vehicle Identification: License plate lights illuminate the license plate, making it clearly visible to law enforcement and other drivers. This aids in vehicle identification, especially during nighttime or low-visibility conditions.
- Accident Prevention: Properly functioning license plate lights increase the vehicle’s visibility, reducing the risk of rear-end collisions and other accidents.
- Theft Deterrence: Illuminated license plates make it easier to identify a vehicle in the event of theft or unauthorized use.
In summary, adhering to safety regulations related to license plate light wiring is crucial for ensuring legal compliance, enhancing vehicle identification, preventing accidents, and deterring theft. By understanding and fulfilling these regulations, drivers contribute to a safer and more responsible driving environment.
Electrical Knowledge
Within the domain of “How To Fix License Plate Light Wiring,” electrical knowledge plays a pivotal role in diagnosing and resolving wiring problems, thereby ensuring the proper functioning of license plate lights. This knowledge encompasses a range of fundamental principles and practical skills that empower individuals to effectively identify, analyze, and rectify electrical faults.
- Understanding Electrical Components: Familiarity with common electrical components, such as wires, fuses, relays, and switches, is essential for comprehending the license plate light wiring system and its functionality.
- Electrical Circuit Analysis: The ability to analyze electrical circuits, tracing the flow of current and identifying potential points of failure, is crucial for troubleshooting wiring issues.
- Electrical Testing and Measurement: Proficiency in using basic electrical testing equipment, such as multimeters and circuit testers, enables accurate diagnosis of wiring problems and verification of proper circuit operation.
- Wiring Repair Techniques: Knowledge of proper wiring repair techniques, including soldering, crimping, and heat shrinking, ensures reliable and long-lasting repairs.
In essence, electrical knowledge provides the foundation for understanding, diagnosing, and resolving wiring issues in license plate light systems. Individuals with a grasp of these principles can effectively restore the functionality of these lights, ensuring compliance with safety regulations, enhancing vehicle visibility, and contributing to overall road safety.
Tools and Equipment
In the context of “How To Fix License Plate Light Wiring,” the availability and proper use of appropriate tools and equipment are indispensable for effective troubleshooting and repair. These tools empower individuals to diagnose issues accurately, perform repairs efficiently, and ensure the reliable functioning of license plate lights.
- Electrical Testing Equipment: Multimeters are essential for electrical testing, enabling the measurement of voltage, current, and resistance. This information is crucial for identifying faults in the wiring system, such as open circuits, short circuits, or poor connections.
- Electrical Insulation: Electrical tape is used to insulate and protect electrical connections, preventing short circuits and ensuring the safety of the repair. Additionally, heat shrink tubing can provide a more durable and waterproof insulation.
- Wire Stripping and Crimping Tools: Wire strippers are used to remove the insulation from wires, allowing for proper connections. Crimping tools ensure secure and reliable connections by crimping wire terminals onto the stripped wires.
- Soldering Equipment: In certain cases, soldering may be necessary to create permanent and robust electrical connections. A soldering iron, solder, and flux are essential for this purpose.
The availability of these tools and equipment enables individuals to approach license plate light wiring repairs with confidence and efficiency. By employing the appropriate tools and techniques, they can effectively restore the functionality of these lights, ensuring compliance with safety regulations, enhancing vehicle visibility, and contributing to overall road safety.
Wiring Diagram
In the context of “How To Fix License Plate Light Wiring,” a wiring diagram serves as a crucial guide for comprehending the electrical layout of the license plate lighting system. It provides a visual representation of the wiring connections, components, and pathways, empowering individuals to troubleshoot issues effectively and perform repairs with greater accuracy.
- Component Identification: A wiring diagram allows for the identification of each electrical component within the license plate light wiring system. This includes bulbs, sockets, switches, relays, and fuses, along with their specific locations and connections.
- Circuit Tracing: By following the wiring diagram, individuals can trace the flow of electricity through the circuit, identifying the path from the power source to the license plate lights. This enables them to pinpoint the exact location of a fault or issue.
- Connector Visualization: The wiring diagram provides a clear representation of electrical connectors, their types, and their locations. This information aids in the inspection and repair of connectors, ensuring proper electrical contact and preventing corrosion-related problems.
- Grounding Verification: A wiring diagram helps verify the grounding points within the license plate light wiring system. Grounding is crucial for completing the electrical circuit and ensuring proper functioning of the lights. The diagram helps identify grounding points and assess their integrity.
In summary, referencing a wiring diagram specific to the vehicle model is an indispensable aspect of “How To Fix License Plate Light Wiring.” It empowers individuals to understand the electrical layout of the system, trace circuits, identify components, verify grounding points, and troubleshoot issues with greater efficiency and accuracy. By utilizing a wiring diagram, one can ensure that license plate lights are functioning properly, enhancing vehicle safety and compliance with regulations.
Troubleshooting Techniques
In the realm of “How To Fix License Plate Light Wiring,” troubleshooting techniques play a pivotal role in identifying and resolving electrical faults within the license plate lighting system. These techniques provide a systematic approach to diagnosing the root cause of the issue, enabling efficient repairs and restoration of proper lighting functionality.
One crucial aspect of troubleshooting is checking for power, ground, and continuity. This involves verifying the presence of electrical power at various points in the circuit, ensuring a complete and continuous electrical pathway. By systematically checking these parameters, individuals can isolate the source of the problem and determine whether it originates from a power supply issue, a grounding fault, or an interruption in the wiring.
For instance, if the license plate lights are not illuminating, a simple check for power at the light socket can determine whether the issue lies within the wiring or the bulbs themselves. Similarly, verifying the continuity of the circuit using a multimeter can identify any breaks or faults in the wiring, guiding the repair process and ensuring a targeted approach.
In summary, the systematic application of troubleshooting techniques, including checking for power, ground, and continuity, is a critical component of “How To Fix License Plate Light Wiring.” These techniques empower individuals to pinpoint the exact cause of the issue, leading to effective repairs, enhanced vehicle safety, and compliance with safety regulations.
Bulb Replacement
Bulb replacement is an essential aspect of “How To Fix License Plate Light Wiring” as it directly affects the functionality and safety of the vehicle’s lighting system. Replacing a burnt-out or malfunctioning license plate light bulb ensures that the vehicle remains compliant with legal requirements and enhances its visibility on the road, especially during nighttime or in low-visibility conditions.
- Bulb Selection and Compatibility: Selecting the correct replacement bulb for the license plate light is crucial for ensuring proper fit, brightness, and longevity. The vehicle’s owner’s manual or a qualified mechanic can provide guidance on the specific bulb type and specifications required for the license plate light.
- Safe Bulb Handling: Handling halogen or incandescent bulbs with bare hands can transfer oils from the skin to the glass surface, which can cause premature bulb failure. It is recommended to wear gloves or use a clean cloth when handling these bulbs.
- Socket Inspection and Cleaning: Before installing a new bulb, inspect the bulb socket for any signs of corrosion or damage. Clean the socket contacts using a cotton swab dipped in rubbing alcohol to ensure good electrical contact.
- Bulb Installation and Alignment: When installing the new bulb, align it correctly within the socket and gently push or twist it into place. Avoid overtightening the bulb as this can damage the socket or the bulb itself.
By understanding and following the proper steps for bulb replacement, individuals can ensure that their license plate lights are functioning optimally, contributing to the overall safety and compliance of their vehicle on the road.
Connector Inspection
Within the scope of “How To Fix License Plate Light Wiring,” connector inspection plays a pivotal role in ensuring reliable electrical connections and preventing potential issues caused by corrosion. Connectors are essential components that facilitate the flow of electricity between different parts of the wiring system, and their integrity is crucial for the proper functioning of license plate lights.
- Visual Inspection: Regularly inspecting electrical connectors for signs of damage, such as loose or broken terminals, melted plastic, or exposed wires, is essential for identifying potential problems early on.
- Contact Cleaning: Over time, dirt, moisture, and corrosion can accumulate on the contacts of electrical connectors, leading to poor electrical contact and increased resistance. Cleaning these contacts using a contact cleaner or a cotton swab dipped in rubbing alcohol can restore proper conductivity.
- Connector Replacement: In cases where connectors are severely damaged or corroded beyond repair, replacement may be necessary. It is important to use connectors that are compatible with the specific wiring system and that meet the required electrical specifications.
- Proper Reassembly: After inspection and cleaning, connectors should be reassembled correctly to ensure a secure and weather-resistant connection. This may involve applying dielectric grease to the contacts for added protection against moisture and corrosion.
By understanding and following the proper steps for connector inspection, individuals can proactively address potential issues, maintain optimal electrical connections, and prevent corrosion-related failures in their license plate light wiring systems. This contributes to the overall reliability, safety, and longevity of the vehicle’s lighting system.
Grounding
Within the context of “How To Fix License Plate Light Wiring,” the aspect of grounding holds crucial importance in ensuring the proper functioning of license plate lights. Grounding refers to the electrical connection between the negative terminal of the battery and the metal frame of the vehicle, providing a complete path for the flow of electrical current. Without a proper ground connection, the electrical circuit remains incomplete, hindering the proper operation of the lights.
- Chassis Grounding: The chassis of the vehicle typically serves as the primary grounding point for the electrical system, including the license plate lights. Verifying a secure connection between the negative terminal of the battery and the chassis ensures proper grounding.
- Light Assembly Grounding: Each license plate light assembly should have a dedicated ground wire that connects it to the chassis or a common grounding point. Inspecting and cleaning these connections can resolve issues related to poor grounding.
- Wire Inspection: Ground wires should be free of damage, corrosion, or loose connections. Inspecting the entire length of the ground wires can identify potential issues that may disrupt the grounding path.
- Multiple Grounding Points: In some cases, multiple grounding points may be utilized to enhance electrical stability. Verifying the integrity of all grounding points can improve the overall reliability of the grounding system.
Ensuring proper grounding is essential for completing the electrical circuit and allowing current to flow from the power source, through the license plate lights, and back to the negative terminal of the battery. By understanding and addressing grounding-related issues, individuals can effectively troubleshoot and repair license plate light wiring, ensuring the proper functioning of these important safety features.


Related Posts


