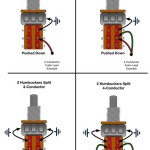
Guitar wiring schematics are pictorial diagrams outlining the electrical connections within a guitar’s electronics system. An example is the Fender Stratocaster’s five-way pickup selector switch, which routes the signal from various pickup combinations to the output jack.
These schematics are crucial for understanding and troubleshooting guitar wiring. They provide a visual representation of the circuit, making it easier to identify the correct wiring configuration and components. The development of standardized wiring diagrams in the mid-20th century played a significant role in the widespread adoption and maintenance of electric guitars.
This article delves further into guitar wiring schematics, exploring their components, conventions, and practical applications in guitar repair and modification.
Guitar wiring schematics are visual guides to the electrical connections within a guitar’s electronics system. Understanding these schematics is essential for guitarists, repair technicians, and anyone interested in modifying or building their own guitars.
- Components: Resistors, capacitors, pickups, switches.
- Circuitry: Series, parallel, and mixed configurations.
- Signal flow: Tracing the path of the electrical signal.
- Grounding: Ensuring proper electrical reference.
- Shielding: Minimizing electromagnetic interference.
- Troubleshooting: Identifying and resolving electrical issues.
- Modifications: Customizing the guitar’s sound and functionality.
- Historical evolution: From early single-coil designs to modern active electronics.
- Industry standards: Ensuring compatibility and ease of repair.
These key aspects provide a comprehensive understanding of guitar wiring schematics. They enable guitarists to optimize their instrument’s performance, repair technicians to diagnose and fix electrical problems, and DIY enthusiasts to build and modify guitars to their specifications.
Components
Within the context of guitar wiring schematics, components such as resistors, capacitors, pickups, and switches play crucial roles in shaping the guitar’s sound and functionality. Understanding the function and interaction of these components is essential for effective guitar maintenance, repair, and modification.
-
Resistors
Resistors control the flow of electrical current within the circuit, affecting the volume and tone of the guitar. Common values include 250k and 500k. -
Capacitors
Capacitors store electrical charge, filtering out unwanted frequencies and smoothing the guitar’s sound. Ceramic and electrolytic capacitors are commonly used. -
Pickups
Pickups convert the vibrations of the guitar strings into electrical signals, which are then processed by the other components in the circuit. Single-coil, humbucker, and P-90 pickups are popular choices. -
Switches
Switches control the routing of the electrical signal within the circuit, allowing guitarists to select different pickup combinations and activate effects. Common types include toggle switches, rotary switches, and push-pull switches.
By understanding the function and interaction of these components, guitarists and technicians can optimize the guitar’s performance, troubleshoot electrical issues, and customize the instrument’s sound to their preferences. Guitar wiring schematics provide a visual representation of these components and their connections, enabling a deeper understanding of the guitar’s electronics.
Circuitry
The circuitry within guitar wiring schematics comprises a network of electrical components connected in specific configurations, primarily series, parallel, and mixed. These configurations determine the flow of electrical current through the circuit, affecting the guitar’s sound and functionality.
In series connections, components are arranged one after another, with the output of one component feeding into the input of the next. This arrangement increases the total resistance of the circuit, resulting in a decrease in current flow and a reduction in output volume. Series connections are commonly used for volume controls and tone shaping circuits.
In parallel connections, components are arranged side-by-side, with each component receiving the full voltage of the source. This arrangement decreases the total resistance of the circuit, increasing current flow and output volume. Parallel connections are often used for pickup selection switches, allowing multiple pickups to be active simultaneously.
Mixed configurations combine series and parallel connections to achieve specific tonal effects. For instance, a pickup selector switch may combine series and parallel connections to provide a range of pickup combinations with varying degrees of brightness and output.
Understanding the principles of series, parallel, and mixed configurations is essential for interpreting guitar wiring schematics and troubleshooting electrical issues. It enables guitarists and technicians to modify and customize their instruments to achieve desired tonal outcomes.
Signal flow
Signal flow, the tracing of the electrical signal’s path through a guitar’s electronics, is a critical component of guitar wiring schematics. Understanding signal flow enables guitarists and technicians to analyze and troubleshoot electrical issues, customize the guitar’s sound, and optimize its performance.
In guitar wiring schematics, signal flow is represented by the arrangement of components and the connections between them. By tracing the path of the signal from the input (guitar pickups) to the output (output jack), one can identify the components that affect the signal’s characteristics, such as volume, tone, and pickup selection. This understanding is essential for diagnosing problems, such as unwanted noise or signal loss, and for implementing modifications to achieve desired tonal outcomes.
Real-life examples of signal flow tracing within guitar wiring schematics include:
- Identifying the path of the signal from a specific pickup to the output jack, considering the pickup selector switch and any volume or tone controls in the circuit.
- Tracing the signal flow through a tone shaping circuit, such as a low-pass filter or wah pedal, to understand how the circuit modifies the signal’s frequency response.
- Analyzing the signal flow through a complex switching system, such as a super switch or a Varitone circuit, to determine the various pickup combinations and tonal options available.
By understanding signal flow and its representation in guitar wiring schematics, guitarists and technicians gain the knowledge and skills to maintain, repair, and modify their instruments effectively. This understanding empowers them to optimize the guitar’s performance, troubleshoot electrical issues, and customize the instrument’s sound to their preferences.
Grounding
In guitar wiring schematics, grounding plays a critical role in ensuring proper electrical reference within the circuit. It provides a common reference point for all electrical components, allowing the circuit to function correctly and minimize noise and interference.
Without proper grounding, electrical signals can become distorted or corrupted, resulting in unwanted noise, hum, or intermittent operation. Grounding establishes a stable voltage level throughout the circuit, ensuring that all components operate at their intended voltage levels. This stability is crucial for maintaining the guitar’s overall sound quality and performance.
Real-life examples of grounding in guitar wiring schematics include the connection of the guitar’s bridge and strings to the ground wire. This connection ensures that any electrical noise or interference picked up by the strings is safely discharged to ground, preventing it from entering the signal path and causing unwanted noise. Additionally, the shielding of the guitar’s body and electronics compartment helps to minimize electromagnetic interference from external sources, further enhancing the guitar’s sound quality.
Understanding the principles of grounding and its implementation in guitar wiring schematics is essential for guitarists and technicians alike. Proper grounding techniques help to ensure a clean and quiet signal, minimize noise and interference, and maintain the guitar’s optimal performance. By adhering to proper grounding practices, guitarists and technicians can ensure that their instruments sound their best and perform reliably.
Shielding
In the context of guitar wiring schematics, shielding plays a crucial role in minimizing electromagnetic interference (EMI), which can cause unwanted noise and signal degradation. Shielding techniques involve the use of conductive materials to create a barrier between the guitar’s electronics and external sources of EMI, such as power lines, fluorescent lighting, and radio waves.
-
Copper Foil Shielding:
Thin copper foil is applied to the interior of the guitar’s body and pickup cavities, creating a conductive layer that blocks EMI. This is a common and effective shielding method. -
Conductive Paint:
Conductive paint can be applied to the guitar’s body and electronics to create a shielding layer. This method is less common but can provide good EMI protection. -
Shielded Cables:
Shielded cables are used to connect the guitar’s electronics, preventing EMI from entering or escaping the signal path. These cables have a conductive shield around the inner conductor, which blocks EMI. -
Grounding:
Proper grounding of the guitar’s bridge and other metal components provides a low-resistance path for EMI to be discharged to ground, minimizing its impact on the signal.
Effective shielding techniques are essential for achieving a clean and quiet guitar sound, especially in environments with high levels of EMI. By understanding and implementing proper shielding practices, guitarists and technicians can ensure that their instruments perform optimally and are not susceptible to unwanted noise and interference.
Troubleshooting
In the realm of guitar wiring schematics, troubleshooting plays a critical role in maintaining the optimal performance and sound quality of electric guitars. Electrical issues can manifest in various forms, from intermittent crackling to complete signal loss. The ability to identify and resolve these issues is essential for guitarists and technicians alike.
-
Identifying Common Problems:
Understanding the symptoms of common electrical issues, such as loose connections, faulty components, and grounding problems, allows for quick identification of the root cause. -
Signal Tracing:
Tracing the signal path through the schematic and physically along the circuit board helps pinpoint the location of the issue. This involves using a multimeter to measure voltage and continuity at various points in the circuit. -
Component Testing:
Testing individual components, such as resistors, capacitors, and transistors, using a multimeter or component tester, can isolate faulty elements that need to be replaced. -
Grounding Verification:
Ensuring proper grounding of the guitar’s bridge, strings, and electronics is crucial for eliminating noise and ensuring a clean signal. Checking the continuity between these components and the ground reference point is essential.
By understanding these troubleshooting techniques and applying them to guitar wiring schematics, guitarists and technicians can effectively diagnose and resolve electrical issues, ensuring their instruments perform at their best. These skills empower them to maintain, repair, and modify their guitars with confidence, maximizing their playing experience and the enjoyment of their craft.
Modifications
In the realm of guitar wiring schematics, modifications play a central role in customizing the guitar’s sound and functionality. These modifications allow guitarists to tailor their instruments to their unique playing styles and tonal preferences, unlocking a vast array of sonic possibilities.
Guitar wiring schematics serve as a roadmap for understanding and implementing these modifications. By modifying the circuit’s components, connections, and configurations, guitarists can alter the guitar’s pickup selection, tone shaping, and overall output. For example, adding a treble bleed circuit can brighten the guitar’s sound, while installing a coil tap switch allows for humbucker pickups to operate in single-coil mode, expanding the tonal versatility of the instrument.
Understanding the principles of guitar wiring schematics empowers guitarists to make informed modifications that enhance their playing experience. Whether it’s fine-tuning the guitar’s tone, improving its playability, or adding unique features, modifications offer a powerful avenue for creativity and self-expression. By delving into the intricacies of guitar wiring schematics, guitarists gain the knowledge and skills to transform their instruments into truly personalized works of art.
Historical evolution
The historical evolution of guitar electronics, from early single-coil designs to modern active electronics, is intricately connected to the development and understanding of guitar wiring schematics. These schematics serve as blueprints, guiding the assembly, modification, and repair of guitar circuits. As new pickup designs and electronic components emerged, the complexity of guitar wiring schematics increased, reflecting the evolving tonal possibilities and functional capabilities of the instruments.
The introduction of single-coil pickups in the 1930s marked a significant advancement in guitar sound, providing a brighter and more articulate tone compared to earlier acoustic guitars. These pickups consisted of a coil of wire wrapped around a magnet, and their wiring schematics were relatively simple, focusing on connecting the pickup to the output jack and incorporating basic tone controls. As guitarists sought more tonal variety and output power, humbucker pickups were developed in the 1950s, featuring two coils wired in a way that canceled out hum and produced a thicker, warmer sound. These advancements necessitated more complex wiring schematics to accommodate the additional coils and switching options.
The advent of active electronics in the 1970s revolutionized guitar sound, allowing for greater control over tone shaping and output level. Active pickups incorporated a preamplifier circuit, powered by a battery, which provided a boosted signal with increased headroom and dynamic range. The wiring schematics for active electronics became more intricate, incorporating additional components such as transistors, resistors, and capacitors to create sophisticated filtering and equalization circuits. These advancements expanded the sonic capabilities of guitars, making them suitable for a wider range of musical genres and playing styles.
Understanding the historical evolution of guitar electronics and its reflection in wiring schematics is crucial for guitarists, technicians, and enthusiasts alike. It provides insights into the design principles and circuit configurations that shape the sound and functionality of electric guitars. By studying these schematics, individuals can develop a deeper appreciation for the intricacies of guitar electronics and make informed decisions when modifying or repairing their instruments. Moreover, this understanding fosters a connection to the rich history of guitar innovation, enabling players to trace the evolution of sound and technology that has shaped the instrument’s iconic status in music.
Industry standards
Within the realm of guitar electronics, industry standards play a pivotal role in ensuring the compatibility and ease of repair of guitar wiring schematics. Standardization establishes a common set of guidelines and conventions that manufacturers, technicians, and musicians adhere to, fostering consistency and simplifying troubleshooting and maintenance.
One significant aspect of industry standards is the use of color-coded wiring. Different colors are assigned to specific functions within the circuit, such as ground, power, and signal. This standardized color scheme enables technicians to quickly identify and trace connections, reducing the time and effort required for repairs. Furthermore, it facilitates collaboration among different technicians, as they can easily interpret and work with schematics from various sources.
Another crucial aspect of industry standards is the establishment of common component values and specifications. Resistors, capacitors, and other components are manufactured according to standardized values, ensuring that they are interchangeable and readily available. This standardization allows technicians to easily replace faulty components without the need for extensive research or experimentation. Moreover, it promotes compatibility between different guitars and electronic devices, enabling musicians to mix and match components to achieve their desired sound and functionality.
The understanding of industry standards in guitar wiring schematics empowers guitarists and technicians with the knowledge and tools to maintain, modify, and repair their instruments effectively. By adhering to these standards, they can ensure that their guitars are compatible with a wide range of components and accessories, simplifying the process of upgrades and repairs. Furthermore, this understanding fosters a sense of community within the guitar-playing and repair community, as individuals can share knowledge, collaborate on projects, and troubleshoot issues more efficiently.


Related Posts

