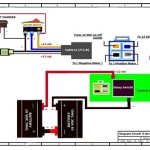
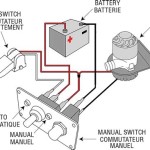
A dual battery wiring diagram for a boat is a schematic that outlines how two batteries are connected to the electrical system of a boat. This setup is common on boats that have multiple electrical devices or accessories, as it allows for the distribution of power between two sources. For example, a boat with a starting battery and a house battery might use a dual battery wiring diagram to ensure that the starting battery is always available to start the engine, while the house battery powers non-essential items such as lights, radios, and pumps.
Dual battery wiring diagrams for boats offer several benefits. They can help to extend the life of both batteries by preventing one battery from being drained completely. They can also provide redundancy in case one battery fails, ensuring that the boat’s electrical system remains operational. Historically, the development of sealed lead-acid batteries and gel batteries made dual battery setups more practical and affordable for boaters, as these batteries are less prone to leaking or spilling than traditional flooded lead-acid batteries.
This article will delve deeper into the key considerations, components, and best practices involved in designing and installing a dual battery wiring diagram for a boat. We will explore different wiring schemes, discuss the importance of proper battery isolation, and provide recommendations for selecting and sizing batteries and wiring.
When designing and installing a dual battery wiring diagram for a boat, there are several essential aspects to consider. These aspects are crucial for ensuring the proper functioning, safety, and longevity of the electrical system.
- Battery Capacity: The total amount of electrical charge that the batteries can store.
- Battery Type: The type of batteries used, such as lead-acid, AGM, or lithium-ion.
- Battery Isolation: The method used to prevent one battery from discharging the other.
- Charging Sources: The devices used to charge the batteries, such as alternators, solar panels, or shore power.
- Circuit Protection: The devices used to protect the electrical system from overloads and short circuits, such as fuses and circuit breakers.
- Load Management: The strategy used to distribute power between the batteries and the electrical devices.
- Wiring: The type and size of wiring used to connect the batteries and electrical components.
- Monitoring: The devices used to monitor the status of the batteries and electrical system, such as battery monitors and voltmeters.
- Safety: The precautions taken to prevent electrical hazards, such as proper grounding and ventilation.
These aspects are interconnected and should be considered holistically when designing a dual battery wiring diagram for a boat. For example, the type of batteries used will influence the charging sources and isolation methods required. Similarly, the load management strategy will affect the wiring and circuit protection needed. A well-designed and installed dual battery system will provide reliable and efficient power for all of the electrical devices on a boat, ensuring a safe and enjoyable boating experience.
Battery Capacity
In the context of a dual battery wiring diagram for a boat, battery capacity is a critical consideration. The capacity of a battery, measured in amp-hours (Ah), determines how much electrical charge it can store and deliver. This, in turn, affects the amount of power available to run the boat’s electrical devices and accessories.
For example, a boat with a large battery capacity will be able to power more devices for longer periods of time than a boat with a smaller battery capacity. This is especially important for boats that are used for extended periods of time, such as liveaboard boats or boats that are used for fishing or cruising. A larger battery capacity can also provide peace of mind, ensuring that there is always enough power to start the engine, even after running multiple devices for an extended period of time.
When designing a dual battery wiring diagram for a boat, it is important to consider the total electrical load that will be placed on the batteries. This includes all of the devices that will be powered by the batteries, as well as the duration of time that they will be used. Once the total electrical load has been determined, the battery capacity can be selected accordingly. It is always a good idea to err on the side of caution and select a battery capacity that is slightly larger than what is needed, to ensure that there is always plenty of power available.
In summary, battery capacity is a critical component of a dual battery wiring diagram for a boat. The capacity of the batteries will determine how much power is available to run the boat’s electrical devices and accessories. When designing a dual battery system, it is important to consider the total electrical load that will be placed on the batteries and to select a battery capacity that is slightly larger than what is needed.
Battery Type
In the context of a dual battery wiring diagram for a boat, the type of batteries used is a critical consideration. Different types of batteries have different characteristics, such as capacity, lifespan, and charging requirements. These characteristics can impact the overall performance and efficiency of the dual battery system.
- Chemistry: Lead-acid, AGM, and lithium-ion batteries all use different chemical reactions to store and release energy. These different chemistries result in different characteristics, such as capacity, lifespan, and charging requirements.
- Capacity: The capacity of a battery is measured in amp-hours (Ah) and represents the amount of electrical charge it can store. Lead-acid batteries typically have the lowest capacity, followed by AGM batteries, and then lithium-ion batteries.
- Lifespan: The lifespan of a battery is measured in cycles, which is the number of times it can be discharged and recharged. Lead-acid batteries typically have the shortest lifespan, followed by AGM batteries, and then lithium-ion batteries.
- Charging requirements: The charging requirements of a battery vary depending on its chemistry. Lead-acid batteries require a higher charging voltage than AGM batteries, and lithium-ion batteries require a specialized charger.
When selecting the type of batteries to use in a dual battery wiring diagram for a boat, it is important to consider the following factors: the total electrical load that will be placed on the batteries, the desired lifespan of the batteries, and the charging system that will be used. Lead-acid batteries are the most affordable option, but they have a shorter lifespan and require more frequent charging. AGM batteries are a good compromise between cost and performance, and they offer a longer lifespan than lead-acid batteries. Lithium-ion batteries are the most expensive option, but they offer the longest lifespan and the highest capacity.
Battery Isolation
In the context of a dual battery wiring diagram for a boat, battery isolation is of paramount importance. Without proper isolation, one battery could discharge the other, leading to a loss of power and potential damage to the batteries. There are several different methods for isolating batteries, each with its own advantages and disadvantages.
- Diode Isolators: Diode isolators are one of the most common methods for isolating batteries. Diodes are semiconductor devices that allow current to flow in only one direction. When connected between two batteries, diodes prevent current from flowing from one battery to the other. Diode isolators are relatively inexpensive and easy to install, but they can cause a small voltage drop.
- Battery Isolator Switches
- Voltage-Sensitive Relays
- ACR (Automatic Charging Relays): ACRs are a more advanced type of battery isolator that uses a voltage-sensitive relay to connect and disconnect the batteries. ACRs are more expensive than diode isolators, but they offer a number of advantages, including the ability to charge both batteries simultaneously and to prevent overcharging.
When selecting a battery isolation method for a dual battery wiring diagram for a boat, it is important to consider the following factors: the size of the batteries, the type of charging system that will be used, and the desired level of redundancy. Diode isolators are a good option for small boats with simple charging systems. Battery isolator switches are a good option for boats that need to be able to isolate the batteries manually. Voltage-sensitive relays are a good option for boats that have complex charging systems. ACRs are the best option for boats that need the highest level of redundancy and performance.
Charging Sources
In the context of a dual battery wiring diagram for a boat, the charging sources play a critical role in maintaining the health and performance of the batteries. Without a reliable charging system, the batteries will eventually discharge and the boat’s electrical system will fail. There are several different types of charging sources that can be used in a dual battery wiring diagram, each with its own advantages and disadvantages.
The most common type of charging source for a boat is the alternator. Alternators are driven by the boat’s engine and generate electricity when the engine is running. Alternators are a good option for boats that are used frequently, as they can provide a consistent source of charging power. However, alternators can be expensive to purchase and install, and they can be less efficient at low engine speeds.
Solar panels are another popular option for charging batteries on a boat. Solar panels convert sunlight into electricity, which can then be used to charge the batteries. Solar panels are a good option for boats that are used in sunny climates, as they can provide a free and renewable source of power. However, solar panels can be expensive to purchase and install, and they can be less effective in cloudy or rainy weather.
Shore power is another option for charging batteries on a boat. Shore power is electricity that is supplied from a dock or marina. Shore power is a good option for boats that are docked for extended periods of time, as it can provide a consistent and reliable source of charging power. However, shore power can be expensive to use, and it is not always available in all locations.
When selecting a charging source for a dual battery wiring diagram for a boat, it is important to consider the following factors: the size of the batteries, the type of boat, the climate, and the budget. Alternators are a good option for boats that are used frequently and have a large budget. Solar panels are a good option for boats that are used in sunny climates and have a moderate budget. Shore power is a good option for boats that are docked for extended periods of time and have access to a power source.
Circuit Protection
In the context of a dual battery wiring diagram for a boat, circuit protection is paramount to safeguard the electrical system from potential hazards and ensure its reliable operation. It involves employing devices that can swiftly interrupt the flow of excessive current, preventing damage to electrical components and minimizing the risk of fire.
- Fuses: Essential safety devices that contain a thin wire designed to melt and break the circuit when excessive current flows, thereby protecting the circuit from damage.
- Circuit Breakers: Reusable protective devices that automatically trip and interrupt the circuit when an overload or short circuit occurs, allowing for easy reset once the fault is cleared.
- Overcurrent Protection Relays: Advanced protective devices that monitor current levels and swiftly disconnect the circuit during abnormal conditions, providing enhanced protection for sensitive electrical equipment.
Implementing a comprehensive circuit protection strategy is vital for a dual battery wiring diagram for a boat. By incorporating appropriate fuses, circuit breakers, and overcurrent protection relays, boat owners can ensure that their electrical systems are shielded from potential electrical faults, maximizing safety and minimizing the risk of damage or injury.
Load Management
In the context of a dual battery wiring diagram for a boat, load management plays a crucial role in ensuring efficient and reliable power distribution throughout the electrical system. It involves implementing strategies and techniques to optimize the flow of electricity from the batteries to various electrical devices and appliances on board.
- Battery Prioritization: This strategy involves designating one battery as the primary source of power for essential systems, such as navigation equipment, communication devices, and bilge pumps, ensuring their uninterrupted operation even when the secondary battery is depleted.
- Load Shedding: This technique involves automatically or manually disconnecting non-essential electrical devices from the power supply when the battery voltage drops below a predefined level, preventing excessive drain and extending battery life.
- Battery Monitoring: Employing devices like battery monitors or voltage gauges provides real-time information on battery status, allowing boat owners to monitor power consumption, identify potential issues, and adjust load management strategies accordingly.
- Smart Charging: Utilizing multi-stage chargers or battery management systems optimizes the charging process, preventing overcharging and extending battery lifespan while ensuring efficient power distribution.
Effective load management in a dual battery wiring diagram for a boat requires careful consideration of electrical loads, battery capacities, and charging capabilities. By implementing appropriate strategies and techniques, boat owners can maximize the efficiency and reliability of their electrical system, ensuring that essential devices always have access to power while optimizing battery performance and longevity.
Wiring
In the context of a dual battery wiring diagram for a boat, the type and size of wiring used to connect the batteries and electrical components play a critical role in ensuring the efficient and safe operation of the electrical system. Proper wiring selection and installation are essential to minimize voltage drop, prevent overheating, and maintain the integrity of the electrical system over time.
- Wire Gauge: The thickness of the wire, measured in American Wire Gauge (AWG), determines its current-carrying capacity. Thicker wires have a lower AWG number and can carry more current without overheating. The appropriate wire gauge for a particular application depends on the amount of current that will be drawn through the wire.
- Wire Type: Marine-grade wire is specifically designed to withstand the harsh environment of a boat, including exposure to water, salt, and UV radiation. It is important to use marine-grade wire throughout the electrical system to ensure durability and reliability.
- Wire Routing: The path of the wiring should be carefully planned to avoid potential hazards and interference with other systems on the boat. Wires should be routed in a way that minimizes the risk of damage from chafing, pinching, or overheating.
- Terminations: The connections between wires and electrical components must be secure and properly insulated to prevent arcing, sparking, and voltage drop. Crimping or soldering the connections and using heat shrink tubing or other insulation is essential for maintaining a reliable electrical system.
Proper wiring is essential for the safe and efficient operation of a dual battery wiring diagram for a boat. By carefully selecting and installing the appropriate wire gauge, type, and routing, boat owners can ensure that their electrical system will provide reliable power for years to come.
Monitoring
In the context of a dual battery wiring diagram for a boat, monitoring devices play a crucial role in ensuring the health and performance of the electrical system. These devices provide real-time information on battery status, voltage, and current flow, enabling boat owners to identify potential issues, optimize power consumption, and prevent premature battery failure.
- Battery Monitors: These devices provide comprehensive information about the battery’s state of charge, voltage, current flow, and health. Advanced battery monitors can also track battery history and provide alerts when maintenance or replacement is needed.
- Voltmeters: These devices measure the voltage of the batteries and electrical system, providing an indication of the battery’s charge level and the overall health of the electrical system.
- Ammeters: These devices measure the current flowing through the electrical system, helping to identify potential overloads or excessive power consumption.
- Warning Lights: These simple yet effective devices provide a visual indication of potential problems, such as low battery voltage or high current draw, allowing boat owners to take immediate action.
By incorporating monitoring devices into a dual battery wiring diagram for a boat, boat owners gain valuable insights into the health and performance of their electrical system. This information empowers them to make informed decisions about power consumption, battery maintenance, and system upgrades, ultimately enhancing the safety, reliability, and longevity of their boat’s electrical system.
Safety
In the context of a dual battery wiring diagram for a boat, safety is of utmost importance. Electrical hazards, if not properly addressed, can lead to serious consequences, including electrical fires, equipment damage, and even injury or death. Proper grounding and ventilation are two critical components of a safe dual battery wiring diagram, as they work together to prevent electrical hazards and ensure the safe operation of the electrical system.
Grounding provides a low-resistance path for electrical current to flow back to the source, preventing the buildup of static electricity and reducing the risk of electrical shock. In a dual battery wiring diagram, the negative terminals of both batteries should be connected to a common grounding point, which is then connected to the boat’s hull. This ensures that any stray electrical current has a safe path to follow, minimizing the risk of electrical hazards.
Ventilation is equally important, as it helps to dissipate heat and prevent the buildup of explosive gases. Batteries, particularly lead-acid batteries, can generate hydrogen gas when charging or discharging. If this gas is allowed to accumulate in a confined space, it can create a fire or explosion hazard. Proper ventilation ensures that any hydrogen gas is safely dissipated, preventing the buildup of hazardous concentrations.
Real-life examples of the importance of safety in a dual battery wiring diagram for a boat are numerous. In one well-documented case, a boat owner neglected to properly ground the negative terminals of his dual batteries. As a result, stray electrical current flowed through the boat’s hull and into the water, causing corrosion and damage to the hull. In another incident, a boat owner failed to provide adequate ventilation for his batteries, leading to the buildup of hydrogen gas. When the batteries were being charged, a spark ignited the hydrogen gas, causing an explosion that destroyed the boat.
These examples underscore the critical importance of safety in a dual battery wiring diagram for a boat. By implementing proper grounding and ventilation, boat owners can significantly reduce the risk of electrical hazards and ensure the safe operation of their electrical system.


Related Posts


