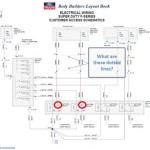
A “Dual Battery RV Wiring Diagram” maps the electrical connections between two batteries in a recreational vehicle (RV). It ensures that both batteries can be charged and used as needed.
Dual battery systems are essential for extending the off-grid capabilities of an RV, providing backup power, and preventing battery drain. Historically, these systems evolved as solar panels and other renewable energy sources became more prevalent, increasing the need for reliable auxiliary power.
In this article, we will explore the components, wiring techniques, and safety considerations for dual battery RV systems, providing a comprehensive guide for DIY enthusiasts and experienced RVers alike.
A “Dual Battery RV Wiring Diagram” serves as a blueprint for connecting two batteries in a recreational vehicle. Understanding its essential aspects is crucial for ensuring a safe and efficient electrical system.
- Battery Type: Selecting compatible batteries (e.g., AGM, lithium) for optimal performance.
- Battery Capacity: Determining the appropriate battery capacity (e.g., amp-hours) to meet power needs.
- Wiring Gauge: Choosing the correct wire gauge to handle the current draw (e.g., AWG 4, AWG 8).
- Fuses and Circuit Breakers: Protecting the system from overloads and short circuits.
- Charge Sources: Identifying the sources of battery charging (e.g., alternator, solar panels).
- Isolation: Preventing batteries from discharging into each other when not in use.
- Monitoring: Tracking battery voltage and charge levels to ensure optimal performance.
- Grounding: Establishing a proper electrical ground for safety and reliability.
- Ventilation: Ensuring adequate ventilation to prevent battery overheating.
- Maintenance: Regular inspection and maintenance to extend the life of the system.
These aspects are interconnected, influencing the overall functionality and safety of the dual battery system. Proper wiring, component selection, and maintenance practices are essential for maximizing battery performance, ensuring reliable power supply, and minimizing the risk of electrical hazards.
Battery Type
In a dual battery RV wiring diagram, selecting compatible batteries is crucial for optimal performance and longevity. Different battery types possess unique characteristics that impact charging, discharging, and overall system efficiency.
- Battery Chemistry: AGM (Absorbent Glass Mat) and lithium batteries are commonly used in RVs. AGM batteries are lead-acid batteries with a glass mat separator, offering higher durability and spill resistance. Lithium batteries, on the other hand, provide higher energy density, longer lifespan, and faster charging capabilities.
- Voltage: Batteries come in various voltage configurations, such as 6V, 12V, and 24V. The battery voltage must match the system’s electrical requirements and charging sources.
- Capacity: Battery capacity is measured in amp-hours (Ah) and indicates the amount of electrical charge it can store. Selecting batteries with sufficient capacity is essential to meet the RV’s power demands.
- Lifespan: Battery lifespan varies depending on type, usage, and maintenance. Lithium batteries generally have longer lifespans compared to AGM batteries.
Choosing compatible batteries involves considering these factors in conjunction with the specific requirements and constraints of the RV electrical system. Proper battery selection ensures efficient charging, maximizes battery life, and optimizes the overall performance of the dual battery RV wiring diagram.
Battery Capacity
In designing a dual battery RV wiring diagram, determining the appropriate battery capacity is crucial for meeting the RV’s power demands and ensuring reliable off-grid operation. Battery capacity, measured in amp-hours (Ah), represents the amount of electrical charge a battery can store and deliver over time.
The relationship between battery capacity and the dual battery RV wiring diagram is direct and critical. An undersized battery may not provide sufficient power to run essential appliances and devices, leading to premature discharge and potential system failure. Conversely, an oversized battery, while providing extended runtime, can be inefficient and add unnecessary weight to the RV.
To determine the appropriate battery capacity, consider the following factors:
- Power consumption: Calculate the total power consumption of all appliances and devices that will be used simultaneously.
- Usage patterns: Determine the duration and frequency of off-grid operation.
- Battery efficiency: Factor in the efficiency of the batteries and the charging system.
- Battery type: Different battery types, such as AGM and lithium, have varying capacities and discharge rates.
Understanding the connection between battery capacity and the dual battery RV wiring diagram empowers RV enthusiasts to design and implement a system that meets their specific power needs. It ensures efficient energy storage, reliable operation, and peace of mind when venturing off the grid.
Wiring Gauge
In the realm of “Dual Battery RV Wiring Diagrams,” selecting the appropriate wiring gauge is paramount to ensure safe and efficient power distribution. Wire gauge, denoted by American Wire Gauge (AWG), directly corresponds to the thickness and current-carrying capacity of electrical wires.
- Current Rating: Each wire gauge has a specified current rating, which determines the maximum amount of current it can safely handle without overheating. Exceeding the current rating can lead to wire damage, voltage drop, and potential fire hazards.
- Wire Length: The length of the wire run also influences the wire gauge selection. Longer wire runs require larger gauges to minimize voltage drop and maintain adequate power delivery.
- Battery Capacity: The capacity of the batteries in the dual battery system determines the amount of current that will be drawn during charging and discharging. Higher battery capacities necessitate thicker wire gauges to accommodate the higher current flow.
- Connection Type: The type of electrical connections used, such as crimp terminals or solder joints, can affect the current-carrying capacity of the wire. Proper crimping or soldering techniques ensure optimal electrical contact and prevent resistance buildup.
Understanding the relationship between wiring gauge and the “Dual Battery RV Wiring Diagram” empowers RV owners and installers to design and implement electrical systems that meet the specific power requirements of their RVs. By carefully considering the current draw, wire length, battery capacity, and connection types, they can ensure safe, reliable, and efficient operation of their dual battery systems.
Fuses and Circuit Breakers
In the realm of “Dual Battery RV Wiring Diagrams,” fuses and circuit breakers play a critical role in ensuring the safety and reliability of the electrical system by protecting it from overloads and short circuits. These protective devices are essential components, safeguarding the batteries, wiring, and connected appliances from potential damage or fire hazards.
- Fuses: Fuses are sacrificial devices that break the circuit when the current exceeds a predetermined level. They act as a failsafe, preventing excessive current from flowing through the system and causing damage to sensitive components.
- Circuit Breakers: Circuit breakers are reusable protective devices that trip when the current exceeds a specified threshold. Unlike fuses, they can be reset once the fault is cleared, eliminating the need for replacement.
- Overloads: Overloads occur when the current drawn from the batteries exceeds their capacity or the wiring’s current-carrying capabilities. Fuses and circuit breakers protect against overloads by interrupting the circuit before damage occurs.
- Short Circuits: Short circuits are abnormal connections between two points in a circuit, causing a sudden and potentially dangerous increase in current flow. Fuses and circuit breakers act as barriers against short circuits by quickly breaking the circuit, preventing catastrophic damage.
By understanding the role and importance of fuses and circuit breakers in “Dual Battery RV Wiring Diagrams,” RV owners and installers can design and implement electrical systems that are not only functional but also safe and reliable. These protective devices ensure that overloads and short circuits are effectively managed, minimizing the risk of damage and ensuring peace of mind while enjoying the freedom of off-grid RV adventures.
Charge Sources
In the context of “Dual Battery RV Wiring Diagrams,” identifying the sources of battery charging is crucial for designing an efficient and reliable electrical system. Charge sources provide the means to replenish the batteries’ stored energy, ensuring uninterrupted power supply for the RV’s electrical appliances and systems.
A typical dual battery RV wiring diagram incorporates multiple charge sources to maximize charging opportunities and extend battery life. The most common sources include:
- Alternator: The alternator, driven by the RV’s engine, generates electricity while the vehicle is in motion. It provides a primary source of charging during driving, replenishing the batteries and maintaining their charge levels.
- Solar Panels: Solar panels convert sunlight into electricity, providing a renewable and sustainable source of charging. They are particularly beneficial for RVers who frequently camp off-grid or in areas with limited access to electrical hookups.
The relationship between “Charge Sources: Identifying the sources of battery charging (e.g., alternator, solar panels).” and “Dual Battery RV Wiring Diagram” is interdependent. The wiring diagram outlines the electrical connections between the batteries, charge sources, and other system components. By carefully considering the available charge sources and their characteristics, RV owners can optimize the wiring diagram to maximize charging efficiency and minimize reliance on external power sources.
Understanding the connection between charge sources and dual battery RV wiring diagrams empowers RV enthusiasts to design and implement electrical systems that meet their specific needs and usage patterns. It enables them to enjoy extended off-grid adventures, enhanced energy independence, and peace of mind knowing that their batteries will remain charged and ready to power their RV’s essential systems.
Isolation
In the realm of “Dual Battery RV Wiring Diagrams,” isolation plays a crucial role in ensuring the optimal performance and longevity of the electrical system. Isolation prevents batteries from discharging into each other when not in use, maintaining their individual charge levels and preventing premature depletion.
- Diode Isolators: These devices allow current to flow in only one direction, preventing batteries from discharging into each other while still allowing them to be charged simultaneously from a single source.
- Battery Combiners: Battery combiners connect batteries in parallel during charging, allowing them to charge at the same rate and preventing overcharging of one battery. When charging ceases, the combiner isolates the batteries, preventing discharge from one to another.
- Battery Disconnect Switches: Manual or automatic switches that physically disconnect batteries from the system when not in use. This provides complete isolation, preventing any parasitic drain or accidental discharge.
- Proper Wiring: Isolating batteries also involves proper wiring practices, such as using separate cables for each battery and avoiding common grounding points. This minimizes the risk of unintended current flow between batteries.
Isolation in “Dual Battery RV Wiring Diagrams” ensures that batteries retain their charge, maximizing their lifespan and providing reliable power when needed. By implementing isolation measures, RV owners can optimize their electrical systems for efficient battery management and enjoy peace of mind knowing that their batteries will be ready to power their adventures.
Monitoring
In the realm of “Dual Battery RV Wiring Diagrams,” monitoring battery voltage and charge levels is a critical component that ensures optimal performance and longevity of the electrical system. By constantly tracking these parameters, RV owners can identify potential issues early on, take preventive measures, and maintain the health of their batteries.
The connection between “Monitoring: Tracking battery voltage and charge levels to ensure optimal performance.” and “Dual Battery RV Wiring Diagram” is bidirectional. The wiring diagram provides the physical framework for connecting batteries, charge sources, and monitoring devices. Conversely, monitoring systems provide valuable data that can be used to fine-tune the wiring diagram, ensuring efficient charging and discharge cycles.
Real-life examples of “Monitoring: Tracking battery voltage and charge levels to ensure optimal performance.” within “Dual Battery RV Wiring Diagram” include the use of battery monitors, voltmeters, and charge controllers. Battery monitors provide comprehensive information about battery voltage, current, and charge levels, enabling users to identify imbalances or potential problems. Voltmeters measure battery voltage, while charge controllers regulate the charging process to prevent overcharging and extend battery life.
The practical applications of understanding the relationship between “Monitoring: Tracking battery voltage and charge levels to ensure optimal performance.” and “Dual Battery RV Wiring Diagram” are numerous. RV owners can proactively manage their electrical systems, avoid premature battery failure, and optimize charging efficiency. This knowledge empowers them to enjoy extended off-grid adventures, enhanced energy independence, and peace of mind knowing that their batteries are performing at their best.
Grounding
In the context of “Dual Battery RV Wiring Diagrams,” grounding plays a crucial role in ensuring the safe and reliable operation of the electrical system. A proper electrical ground provides a reference point for voltage measurements, prevents electrical shock hazards, and enhances the overall performance of the RV’s electrical components.
- Common Grounding Point: Establishing a single common grounding point for all electrical components ensures that all components share the same electrical reference. This minimizes voltage fluctuations and reduces the risk of electrical malfunctions.
- Chassis Grounding: Connecting the RV’s chassis to the grounding system provides a path for electrical current to flow safely to the earth. This helps prevent electrical shocks and protects against lightning strikes.
- Equipment Grounding: Grounding all electrical equipment, such as appliances and lighting fixtures, is essential for safety. It ensures that any electrical faults are safely discharged to ground, preventing damage to equipment and reducing the risk of electrical fires.
- Wiring and Conductors: Proper grounding requires using appropriate wiring and conductors. These components must be sized correctly to carry the electrical current safely and minimize voltage drop.
Understanding and implementing proper grounding techniques is a critical aspect of designing and installing “Dual Battery RV Wiring Diagrams.” By ensuring a well-grounded electrical system, RV owners can enhance safety, improve electrical performance, and extend the lifespan of their RV’s electrical components.
Ventilation
In the context of “Dual Battery RV Wiring Diagrams,” ventilation plays a crucial role in ensuring the safety and longevity of the electrical system. Batteries generate heat during charging and discharging, and inadequate ventilation can lead to overheating, reduced performance, and even thermal runaway.
- Battery Compartment: Batteries should be installed in a well-ventilated compartment that allows for free air circulation. Avoid enclosing batteries in tight spaces or covering them with materials that restrict airflow.
- Battery Chargers: Battery chargers also generate heat, so it’s important to ensure they are properly ventilated. Install chargers in a location with good airflow and avoid placing them near heat sources.
- Fans: Installing fans in the battery compartment can help circulate air and dissipate heat. Fans can be powered by the RV’s electrical system or by solar panels.
- Vents: Vents can be installed in the battery compartment to allow for passive airflow. Vents should be placed on opposite sides of the compartment to create a cross-breeze.
By understanding and implementing proper ventilation techniques, RV owners can minimize the risk of battery overheating, extend the lifespan of their batteries, and ensure the safe and reliable operation of their electrical system.
Maintenance
In the context of “Dual Battery RV Wiring Diagrams,” regular inspection and maintenance are crucial for ensuring the longevity and reliability of the electrical system. Batteries, wiring, and other components require periodic checks and servicing to identify potential issues, prevent failures, and extend their lifespan.
Neglecting maintenance can lead to a range of problems, including battery damage, wiring faults, and reduced system efficiency. Simple tasks like cleaning battery terminals, checking wire connections, and monitoring fluid levels can help prevent major issues and costly repairs down the road. Regular maintenance also allows RV owners to identify potential problems early on, before they become more severe.
Real-life examples of maintenance tasks within a “Dual Battery RV Wiring Diagram” include:
- Inspecting battery terminals for corrosion and cleaning them as needed.
- Checking wire connections for tightness and signs of damage.
- Monitoring battery fluid levels (for flooded lead-acid batteries) and adding distilled water as required.
- Testing batteries regularly using a battery tester or hydrometer.
- Checking the operation of battery chargers and inverters.
By understanding the connection between maintenance and “Dual Battery RV Wiring Diagrams,” RV owners can create a proactive maintenance schedule that will help them get the most out of their electrical system. Regular inspection and maintenance will extend the lifespan of batteries, prevent costly repairs, and ensure the safe and reliable operation of the RV’s electrical components.


Related Posts

