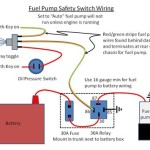
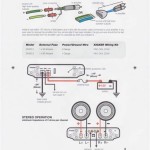
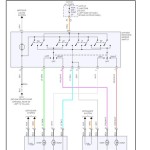
A car speaker wiring diagram provides detailed visual instructions on how to connect and power car speakers to an audio system and head unit. It outlines the connections for different types of speakers, including component speakers, coaxial speakers, and subwoofers, and specifies the wire gauge and connectors required for each component.
Wiring diagrams play a critical role in ensuring correct speaker installation and preventing damage to the audio system. They improve sound quality, simplify the installation process, and help avoid potential electrical hazards. One key historical development in car speaker wiring is the adoption of color-coded wires to simplify the identification and connection process.
In this article, we will explore the different types of car speaker wiring diagrams, their components, and installation best practices. We will also provide practical tips and troubleshooting techniques to assist with successful car speaker installation.
Understanding the essential aspects of car speaker wiring diagrams is crucial for successful car audio installation. These diagrams provide detailed instructions on how to connect and power car speakers to an audio system and head unit, ensuring correct installation and preventing damage to the audio system. Key aspects to consider include:
- Speaker type (component, coaxial, subwoofer)
- Wire gauge
- Connectors
- Polarity
- Power handling
- Crossover frequencies
- Impedance matching
- Signal routing
- Grounding
These aspects are interconnected and influence the overall performance and sound quality of the car audio system. For instance, using the correct wire gauge ensures efficient power transfer and minimizes signal loss, while proper grounding prevents electrical noise and interference. Understanding these aspects enables installers to make informed decisions during the wiring process, resulting in a well-functioning and high-quality car audio system.
Speaker type (component, coaxial, subwoofer)
In the context of car speaker wiring diagrams, the type of speaker (component, coaxial, or subwoofer) is a critical component that determines the specific wiring requirements. Each type of speaker has its own unique design and functionality, which necessitate different wiring configurations to achieve optimal performance.
Component speakers, for example, consist of separate woofer and tweeter units, providing greater flexibility in placement and sound customization. This separation requires dedicated wiring for each unit, with the woofer typically handling lower frequencies and the tweeter handling higher frequencies. Coaxial speakers, on the other hand, integrate both woofer and tweeter elements into a single unit, simplifying the installation process and requiring only a single set of wires.
Subwoofers, designed to reproduce low-frequency bass sounds, demand specific wiring considerations due to their higher power handling capabilities. They typically require thicker gauge wires to accommodate the increased current flow, and may also incorporate additional components such as crossovers or equalizers to optimize their performance. Understanding the different speaker types and their wiring requirements is essential for creating an effective car speaker wiring diagram that meets the specific needs of the audio system.
In practical applications, car speaker wiring diagrams provide clear instructions on how to connect each type of speaker to the audio system, ensuring proper functionality and sound quality. By following these diagrams, installers can avoid potential issues such as incorrect polarity, impedance mismatch, or insufficient power delivery, which can compromise the overall performance of the car audio system.
Wire gauge
In the context of car speaker wiring diagrams, wire gauge plays a crucial role in determining the electrical characteristics and performance of the audio system. Wire gauge refers to the thickness of the electrical wire used to connect the speakers to the audio system components, and it has a direct impact on the amount of current that can flow through the wire.
A thicker wire gauge (lower numerical value) indicates a larger cross-sectional area, allowing for greater current flow with reduced resistance. In car speaker wiring diagrams, thicker gauge wires are typically used for subwoofers and high-power speakers, as they demand more electrical current to operate efficiently. Conversely, thinner gauge wires (higher numerical value) are suitable for lower-power speakers, such as tweeters, which require less current.
Understanding the relationship between wire gauge and car speaker wiring diagrams is essential for several reasons. First, using the correct wire gauge ensures that the speakers receive adequate power to perform optimally. Undersized wires can limit current flow, resulting in reduced speaker performance and potential damage. Secondly, proper wire gauge selection minimizes power loss due to resistance, ensuring that the speakers receive the maximum power output from the audio system. This is particularly important for subwoofers, which require significant power to produce deep bass.
In practical applications, car speaker wiring diagrams specify the recommended wire gauge for each speaker connection, based on factors such as speaker power handling, distance from the audio system, and the overall electrical demands of the system. By following these recommendations, installers can ensure that the wiring is capable of handling the current requirements of the speakers, resulting in a well-functioning and high-quality car audio system.
Connectors
Within the context of car speaker wiring diagrams, connectors play a critical role in establishing electrical connections between the various components of the car audio system. These connectors ensure the proper flow of audio signals and power to the speakers, enabling them to function optimally and deliver high-quality sound.
The type of connectors used in car speaker wiring diagrams depends on several factors, including the speaker type, wire gauge, and the specific audio system configuration. Common types of connectors include spade connectors, banana plugs, and pin connectors. Each type of connector has its own advantages and applications, and the choice of connector is often determined by the specific requirements of the installation.
Understanding the role of connectors in car speaker wiring diagrams is essential for several reasons. Proper connector selection and installation ensure a secure and reliable connection, minimizing signal loss and preventing potential electrical issues. Additionally, using the correct connectors helps to simplify the installation process, making it easier to assemble and disassemble the audio system as needed.
In practical applications, car speaker wiring diagrams provide detailed instructions on the types of connectors required for each speaker connection, as well as the proper way to connect and secure them. By following these diagrams, installers can ensure that the connectors are properly mated, making good electrical contact and preventing intermittent connections or short circuits that could compromise the performance of the car audio system.
Polarity
In the context of car speaker wiring diagrams, polarity refers to the correct alignment of the positive and negative terminals of the speaker with the corresponding terminals of the audio system components. Maintaining proper polarity is essential for ensuring that the speakers operate in phase, producing cohesive and well-balanced sound.
-
Speaker Terminals
Every speaker has two terminals, typically marked with a positive (+) and a negative (-) sign. The positive terminal should be connected to the positive terminal of the audio system, and the negative terminal to the negative terminal.
-
Amplifier Terminals
Similarly, amplifiers have positive and negative terminals for each speaker output channel. The positive terminal of the amplifier should be connected to the positive terminal of the speaker, and the negative terminal to the negative terminal.
-
Phasing
When speakers are connected with the correct polarity, they are said to be “in phase.” This means that the speaker cones move in the same direction at the same time, resulting in reinforced sound output. Incorrect polarity causes the speakers to be “out of phase,” resulting in weakened or canceled-out sound.
-
Troubleshooting
Incorrect polarity can be identified by listening for uneven or distorted sound. If the sound lacks bass or appears “muddy,” it may indicate reversed polarity. Swapping the positive and negative connections of one speaker can typically resolve the issue.
Maintaining proper polarity is a crucial aspect of car speaker wiring diagrams. By understanding the components and implications of polarity, installers can ensure that their car audio systems deliver optimal sound quality and performance.
Power handling
In the context of car speaker wiring diagrams, power handling refers to the ability of the speaker to handle electrical power without causing damage or distortion. Understanding power handling is crucial for selecting appropriate wiring components and ensuring the optimal performance of the car audio system.
-
RMS Power Rating
The RMS (root mean square) power rating indicates the continuous power that a speaker can handle without overheating or causing damage. It is important to match the RMS power rating of the speaker to the power output of the amplifier to avoid overloading.
-
Peak Power Handling
The peak power handling refers to the maximum amount of power that a speaker can handle for short periods without damage. While peak power handling is not as important as RMS power rating for continuous use, it provides an indication of the speaker’s ability to withstand occasional high-power transients.
-
Impedance
Impedance is the resistance of the speaker to the flow of electrical current. Matching the impedance of the speaker to the amplifier is crucial for efficient power transfer and avoiding potential damage. Mismatched impedance can result in reduced power output or overheating.
-
Wiring Gauge
The gauge of the speaker wire affects its ability to handle power. Thicker gauge wire has lower resistance and can handle higher power levels. Choosing the appropriate wire gauge is important to ensure that the speakers receive adequate power without excessive voltage drop.
Understanding power handling and its various facets enables installers to design and implement car speaker wiring diagrams that optimize the performance and longevity of the audio system. By carefully considering the power handling capabilities of speakers, amplifiers, and wiring components, installers can ensure that all elements are properly matched and operating within their safe limits.
Crossover frequencies
In the context of car speaker wiring diagrams, crossover frequencies play a pivotal role in dividing the audio signal into different frequency ranges and directing them to specific speakers within the audio system. This ensures optimal sound reproduction and enhances the overall listening experience.
-
Component Speakers
Crossover frequencies are particularly important in wiring diagrams for component speaker systems, where separate speakers handle specific frequency ranges. The crossover frequencies determine the point at which the audio signal is split, ensuring that each speaker receives the appropriate frequencies.
-
Woofers and Tweeters
Commonly, crossover frequencies are used to separate the low frequencies (bass) and high frequencies (treble) in a two-way speaker system, directing them to the woofers and tweeters, respectively. This division improves sound clarity and reduces distortion.
-
Passive and Active Crossovers
Crossover frequencies can be implemented using either passive or active crossovers. Passive crossovers consist of electrical components (capacitors and inductors) wired in series or parallel with the speakers, while active crossovers use electronic circuitry to achieve the same result. The choice of crossover type depends on factors such as system complexity and desired sound characteristics.
-
Tuning and Adjustment
In some car audio systems, the crossover frequencies may be adjustable to customize the sound output. This allows users to fine-tune the system’s response to match their listening preferences or the specific acoustics of the vehicle’s interior.
Understanding crossover frequencies and their implications in car speaker wiring diagrams is essential for achieving optimal sound quality and system performance. The proper selection and implementation of crossover frequencies ensure that each speaker operates within its intended frequency range, resulting in a balanced, immersive, and enjoyable audio experience.
Impedance matching
In the realm of car audio, impedance matching plays a crucial role in ensuring efficient power transfer and optimal sound reproduction. Impedance, measured in ohms (), represents the resistance of a speaker to the flow of electrical current. When designing car speaker wiring diagrams, it is essential to consider impedance matching to maximize system performance.
When the impedance of a speaker matches the impedance of the amplifier driving it, a condition known as impedance matching occurs. This harmonious relationship allows for the most efficient transfer of electrical power from the amplifier to the speaker. As a result, the speaker can produce its intended sound output without distortion or damage. Conversely, impedance mismatch, where the speaker’s impedance differs significantly from the amplifier’s output impedance, can lead to reduced power output, increased distortion, and potential harm to the speaker.
In practical terms, car speaker wiring diagrams specify the impedance of each speaker and provide guidance on how to wire multiple speakers together to achieve the desired overall impedance. For instance, connecting two 4-ohm speakers in parallel results in a 2-ohm load, which may require an amplifier capable of handling a lower impedance. Understanding impedance matching enables installers to design wiring configurations that optimize the system’s performance and prevent potential issues.
Signal routing
Signal routing plays a pivotal role in car speaker wiring diagrams, defining the paths that audio signals take from the source unit to the individual speakers. It involves strategically connecting various components, including the head unit, amplifiers, crossovers, and speakers, to ensure proper signal distribution and sound reproduction.
Signal routing is a critical aspect of car speaker wiring diagrams as it directly affects the overall performance and sound quality of the audio system. Proper signal routing ensures that each speaker receives the intended audio frequencies and power levels, resulting in a balanced and immersive listening experience. Conversely, incorrect signal routing can lead to distorted sound, reduced speaker efficiency, or even damage to the audio components.
Real-life examples of signal routing in car speaker wiring diagrams include the use of crossovers to divide the audio signal into different frequency ranges, directing them to specific speakers. For instance, a three-way speaker system may employ a crossover to separate high, mid, and low frequencies, sending them to the tweeters, midrange speakers, and woofers, respectively. Additionally, signal routing considerations extend to the placement of amplifiers, ensuring that they are connected to the appropriate speakers and receiving the necessary power.
Understanding signal routing is crucial for designing effective car speaker wiring diagrams. It enables installers to optimize the system’s performance, avoid potential issues, and achieve the desired sound characteristics. Proper signal routing ensures that each component in the audio system works harmoniously, delivering a high-quality and enjoyable listening experience.
Grounding
Within the context of car speaker wiring diagrams, grounding plays a critical role in ensuring proper electrical functioning and maintaining a safe and stable audio system. It involves establishing a common reference point for electrical circuits, providing a path for current to return to the source, and preventing electrical interference.
-
Chassis Ground
The chassis ground connects the negative terminal of the battery to the metal frame of the vehicle, providing a common ground reference for all electrical components. It ensures that all components share the same electrical potential, minimizing the risk of electrical shocks or interference.
-
Speaker Ground
Each speaker in the audio system requires a proper ground connection to complete the electrical circuit and allow current to flow. The negative terminal of the speaker is typically connected to the chassis ground, providing a path for current to return to the source.
-
Ground Loop
A ground loop occurs when multiple ground paths exist between components, creating a closed loop where current can flow. This can cause electrical interference, resulting in humming or buzzing noises in the audio system. Proper grounding techniques aim to minimize ground loops by ensuring a single, dedicated ground path for each component.
-
Safety
Proper grounding is essential for the safety of the car audio system and its users. It prevents the buildup of stray electrical current, which can pose a fire hazard or cause damage to sensitive electronic components. By providing a safe and controlled path for current to flow, grounding helps ensure the reliable and trouble-free operation of the audio system.
Grounding in car speaker wiring diagrams is crucial for maintaining a stable electrical environment, preventing interference, and ensuring the safety of the system. By understanding and implementing proper grounding techniques, installers can create reliable and high-quality car audio systems that deliver optimal sound performance and minimize potential issues.


Related Posts

