A Hotpoint dryer timer wiring diagram outlines electrical connections between the timer, other components, and power source in a Hotpoint clothes dryer. It provides a visual representation of how wires should be arranged to ensure proper operation of the timer, a crucial component responsible for controlling the drying cycle’s duration and various functions. Without an accurate wiring diagram, setting up or troubleshooting a Hotpoint dryer can become highly challenging.
The benefits of using the correct wiring diagram are significant. It ensures safe and efficient operation of the dryer, minimizing the risk of electrical hazards or component damage. Additionally, accurate wiring enables precise control over the drying process, leading to optimal performance and reduced energy consumption.
Historically, timer wiring diagrams have evolved alongside advancements in dryer technology. Early dryers utilized mechanical timers, which required physical connections and precise wiring. Modern dryers employ digital timers that offer enhanced functionality and user-friendly interfaces. Nevertheless, understanding the underlying wiring connections remains critical for proper installation and maintenance.
The focus of this article will delve deeper into the intricacies of a Hotpoint dryer timer wiring diagram, exploring its components, connections, and troubleshooting techniques. By comprehending the intricacies of the wiring diagram, homeowners and repair professionals can confidently navigate dryer maintenance and repair tasks, ensuring optimal performance and extended appliance lifespan.
Understanding the key aspects of a Hotpoint dryer timer wiring diagram is crucial for safe and efficient dryer operation and repair. These aspects encompass various dimensions related to the wiring diagram, each playing a vital role in ensuring proper functionality.
- Components: Identifying the timer, wires, terminals, and other components involved in the wiring diagram.
- Connections: Understanding how the components are interconnected, including wire colors and terminal designations.
- Circuitry: Analyzing the electrical pathways and circuits associated with the timer.
- Troubleshooting: Using the wiring diagram to diagnose and resolve common timer-related issues.
- Safety: Adhering to electrical safety guidelines and precautions while working with the wiring diagram.
- Maintenance: Utilizing the wiring diagram for regular maintenance tasks, such as cleaning and inspecting connections.
- Replacement: Understanding the process of replacing a faulty timer using the wiring diagram as a guide.
- Compatibility: Ensuring the compatibility of the wiring diagram with specific Hotpoint dryer models.
- Advanced Features: Exploring additional functionalities and features enabled by the timer, as indicated in the wiring diagram.
Delving into these key aspects provides a comprehensive understanding of the Hotpoint dryer timer wiring diagram. By grasping the intricacies of each aspect, homeowners and repair professionals can confidently navigate dryer maintenance and troubleshooting tasks, ensuring optimal performance and extended appliance lifespan.
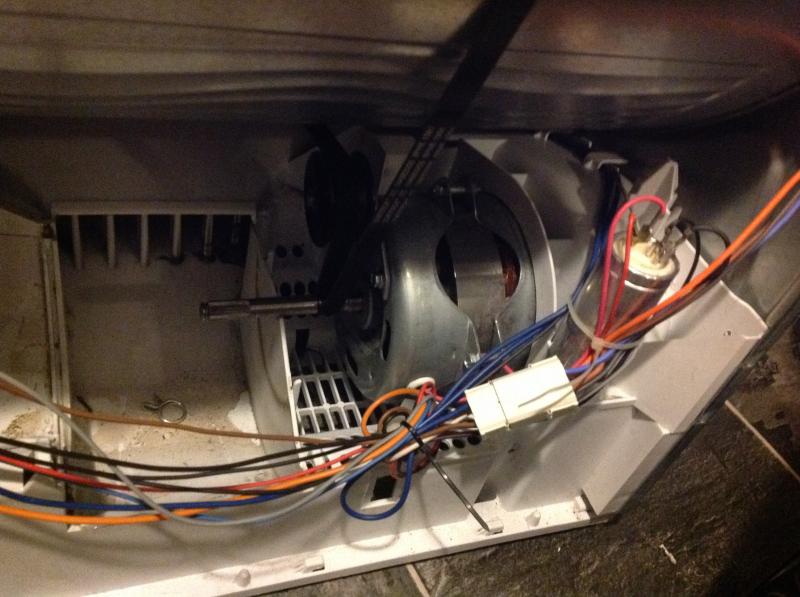
Components
In the context of a Hotpoint dryer timer wiring diagram, identifying the individual componentsincluding the timer, wires, terminals, and any other relevant partsis of paramount importance. These components collectively form the backbone of the wiring diagram, each playing a distinct role in the proper functioning of the dryer’s timer.
The timer serves as the central control unit, orchestrating the various stages of the drying cycle. Wires act as the conduits for electrical signals and power transmission throughout the system, connecting the timer to other components and the power source. Terminals provide secure connection points for wires, ensuring reliable electrical flow. Additional components, such as switches, relays, or capacitors, might also be present, depending on the specific dryer model and its advanced features.Understanding the relationship between these components is crucial for comprehending the overall functionality of the Hotpoint dryer timer wiring diagram. Without a clear identification of each component and its role, troubleshooting becomes challenging, and repair attempts may inadvertently lead to further complications.For instance, if a wire becomes loose or disconnected, the timer may fail to receive power, resulting in the dryer not starting. Similarly, a faulty terminal can lead to intermittent connections, causing erratic timer operation or even electrical hazards. By accurately identifying the components and their interconnections, repair professionals can swiftly pinpoint the source of the problem and implement appropriate solutions.In summary, a thorough understanding of the components involved in a Hotpoint dryer timer wiring diagram is indispensable for effective troubleshooting and repair. By recognizing the critical role of each component and its contribution to the overall system, homeowners and repair professionals can approach maintenance tasks with confidence and precision.
Connections
In the context of a Hotpoint dryer timer wiring diagram, understanding the connections between the various components is paramount. These connections, including wire colors and terminal designations, establish the electrical pathways that allow the timer to control the dryer’s functions. Without proper connections, the timer cannot effectively communicate with other components, leading to malfunction or even safety hazards.
Consider the following example: the timer needs to send a signal to the heating element to initiate the drying process. This signal is transmitted through a specific wire, identified by its unique color and terminal designation. If the wire is not properly connected, the signal may not reach the heating element, resulting in a dryer that fails to heat. Furthermore, incorrect connections can cause short circuits, electrical fires, or damage to the timer or other components.
Therefore, it is crucial for repair professionals to have a thorough understanding of the connections outlined in the wiring diagram. By carefully following the designated wire colors and terminal connections, they can ensure that the timer is properly integrated into the dryer’s electrical system. This not only ensures optimal performance but also minimizes the risk of electrical issues and safety concerns.
In summary, understanding the connections between components, including wire colors and terminal designations, is a critical aspect of working with a Hotpoint dryer timer wiring diagram. Accurate connections are essential for proper timer operation and overall dryer functionality, ensuring safety, efficiency, and longevity.
Circuitry
Within the context of a Hotpoint dryer timer wiring diagram, analyzing the associated circuitry is a crucial step toward comprehending the intricate electrical pathways and circuits that govern the timer’s functionality. This analysis forms the foundation for understanding how the timer interacts with other components within the dryer system, ultimately enabling effective troubleshooting and repair.
Consider the following scenario: a dryer fails to heat, despite the timer appearing to function correctly. By analyzing the circuitry, a repair professional can trace the electrical pathways from the timer to the heating element. This allows them to identify potential breaks, loose connections, or faulty components that may be interrupting the flow of electricity and preventing the heating element from activating.
Furthermore, understanding the circuitry enables repair professionals to anticipate the impact of component failures on the overall system. For instance, a malfunctioning capacitor within the timer circuit can disrupt the timing mechanism, leading to erratic drying cycles or even complete failure of the timer. By recognizing these cause-and-effect relationships, repair professionals can quickly isolate the root cause of the problem and implement targeted solutions.
In essence, analyzing the circuitry associated with the timer empowers repair professionals with the knowledge necessary to effectively diagnose and resolve a wide range of issues. This understanding extends beyond the specific context of Hotpoint dryer timer wiring diagrams, as it provides a solid foundation for troubleshooting and repairing electrical systems in general.
Troubleshooting
In the context of a Hotpoint dryer timer wiring diagram, troubleshooting forms an integral part of maintaining optimal dryer performance. The wiring diagram serves as a roadmap for repair professionals, guiding them in diagnosing and resolving common timer-related issues. Without a thorough understanding of the wiring diagram, troubleshooting becomes a haphazard and time-consuming process, often leading to misdiagnosis and ineffective repairs.
Consider a scenario where a dryer fails to start, despite power being supplied to the appliance. By analyzing the wiring diagram, a repair professional can systematically trace the electrical pathways associated with the timer. This enables them to identify potential breaks, loose connections, or faulty components that may be preventing the timer from receiving power or sending signals to other components.
Furthermore, the wiring diagram provides insights into the logical flow of the timer’s operation. This knowledge empowers repair professionals to anticipate the impact of specific component failures on the overall system. For instance, a malfunctioning relay within the timer circuit can disrupt the power supply to the heating element, resulting in a dryer that fails to heat. By understanding these cause-and-effect relationships, repair professionals can quickly isolate the root cause of the problem and implement targeted solutions.
In essence, the wiring diagram is an indispensable tool for troubleshooting timer-related issues in Hotpoint dryers. It provides a structured approach to diagnosing faults, minimizing the risk of misdiagnosis and unnecessary component replacements. By leveraging the wiring diagram, repair professionals can effectively restore dryer functionality, ensuring customer satisfaction and extending appliance lifespan.
Safety
When working with a Hotpoint dryer timer wiring diagram, adhering to electrical safety guidelines and precautions is paramount. Understanding and following these essential safety measures helps prevent electrical hazards, ensuring the safety of both the individual working on the wiring diagram and those around them. It also safeguards the integrity of the dryer itself, preventing damage or malfunction.
- Proper Insulation: Ensuring that all electrical wires and connections are properly insulated is crucial. This prevents electrical shock hazards and potential short circuits. Inspect wires for any exposed or damaged insulation and replace them if necessary.
- Circuit Breaker Safety: Before beginning any work, turn off the circuit breaker associated with the dryer at the main electrical panel. This isolates the dryer from the power source, eliminating the risk of electrical shocks or electrocution.
- Grounding: Ensure that the dryer is properly grounded to prevent electrical shocks. The grounding wire (usually green or bare copper) must be securely connected to both the dryer frame and the electrical panel ground.
- Protective Gear: When working with electrical components, it is essential to wear appropriate protective gear, such as insulated gloves and safety glasses. This gear helps minimize the risk of electrical shock and eye injuries.
By adhering to these safety guidelines and precautions, individuals can work with Hotpoint dryer timer wiring diagrams safely and effectively. Following these measures not only protects against electrical hazards but also ensures the accuracy and reliability of the wiring work, contributing to the overall safety and functionality of the dryer.
Maintenance
Within the context of a Hotpoint dryer timer wiring diagram, regular maintenance tasks play a critical role in ensuring the dryer’s optimal performance and longevity. The wiring diagram provides a comprehensive guide for these maintenance activities, empowering homeowners and repair professionals alike to effectively clean and inspect connections, minimizing the risk of electrical hazards and extending the dryer’s lifespan.
Consider the following real-life example: a dryer that intermittently fails to heat may have loose or corroded connections in its timer circuit. By referring to the wiring diagram, a repair professional can pinpoint the exact location of these connections and perform the necessary cleaning or tightening. This targeted approach ensures efficient troubleshooting and prevents unnecessary component replacements, saving both time and resources.
Understanding the wiring diagram is also crucial for proper cleaning procedures. Dust, debris, and moisture can accumulate on connections over time, potentially leading to electrical malfunctions. The wiring diagram provides a clear visual representation of all connections, enabling maintenance personnel to identify and clean these areas thoroughly, ensuring reliable electrical flow and preventing premature component failure.
In summary, utilizing the Hotpoint dryer timer wiring diagram for regular maintenance tasks offers numerous practical benefits. By following the diagram’s guidance, homeowners and repair professionals can effectively clean and inspect connections, proactively addressing potential electrical issues and extending the dryer’s operational lifespan. Regular maintenance not only ensures the dryer’s functionality but also promotes safety and energy efficiency, ultimately providing peace of mind and reducing the likelihood of costly repairs in the future.
Replacement
Within the comprehensive framework of “Hotpoint Dryer Timer Wiring Diagram”, the aspect of replacement plays a crucial role in maintaining optimal dryer performance and longevity. When a faulty timer necessitates replacement, accurate guidance is paramount to ensure a successful repair. The wiring diagram serves as an invaluable tool throughout this process, providing a detailed visual representation of the electrical connections and components involved.
- Identifying the Correct Timer: The wiring diagram helps identify the specific timer model compatible with the dryer. This ensures compatibility between the replacement timer’s electrical characteristics and the dryer’s electrical system.
- Preparing for Replacement: Before initiating the replacement process, the wiring diagram guides the technician in disconnecting power to the dryer and isolating the timer. This step minimizes electrical hazards and ensures a safe working environment.
- Wiring the New Timer: Utilizing the wiring diagram as a reference, the technician connects the new timer to the electrical system. Color-coded wires and clearly labeled terminals facilitate accurate and secure connections, preventing wiring errors.
- Testing and Verification: Upon completion of the wiring, the wiring diagram aids in testing the functionality of the new timer. By following the diagram’s instructions, the technician can verify the timer’s proper operation and ensure the dryer’s restored performance.
In conclusion, the wiring diagram is an indispensable guide for replacing a faulty timer in a Hotpoint dryer. It provides a comprehensive understanding of the electrical connections and components involved, enabling technicians to perform the replacement process accurately and efficiently. By leveraging the wiring diagram’s guidance, technicians can restore the dryer’s functionality, ensuring continued optimal performance and extending its lifespan.
Compatibility
Within the comprehensive context of “Hotpoint Dryer Timer Wiring Diagram”, ensuring compatibility between the wiring diagram and specific Hotpoint dryer models is of paramount importance. The wiring diagram serves as a roadmap for electrical connections and component interactions within the dryer, and its compatibility with the specific dryer model ensures accurate and efficient operation. Mismatched wiring diagrams can lead to incorrect connections, electrical hazards, and impaired dryer performance.
- Model Variations: Hotpoint dryers come in various models, each with unique electrical configurations. The wiring diagram must correspond to the specific dryer model to ensure compatibility with its electrical system, components, and features.
- Timer Types: Hotpoint dryers may utilize different types of timers, such as mechanical or electronic timers. The wiring diagram should align with the type of timer installed in the dryer to ensure proper electrical connections and functionality.
- Component Compatibility: The wiring diagram provides a guide for connecting various components within the dryer, including the timer, heating element, motor, and sensors. Compatibility ensures that these components are correctly connected and function in harmony.
- Safety Features: Hotpoint dryers incorporate safety features such as thermal fuses and moisture sensors. The wiring diagram should account for these safety features and provide instructions for their proper connection, ensuring the safe operation of the dryer.
In conclusion, ensuring compatibility between the wiring diagram and specific Hotpoint dryer models is fundamental for safe, efficient, and reliable dryer operation. By adhering to the correct wiring diagram, technicians and homeowners can confidently perform repairs, replacements, and maintenance tasks, extending the dryer’s lifespan and optimizing its performance.
Advanced Features
Within the comprehensive context of “Hotpoint Dryer Timer Wiring Diagram,” advanced features play a significant role in enhancing the functionality and user experience of the dryer. The wiring diagram serves as a guide to these advanced features, providing insights into the electrical connections and configurations that enable them.
One notable example of an advanced feature facilitated by the timer, as indicated in the wiring diagram, is the ability to program custom drying cycles. This feature allows users to tailor the drying process to specific fabric types or desired dryness levels. The wiring diagram provides instructions for connecting the timer to sensors that monitor temperature and moisture, enabling precise control over the drying cycle.
Furthermore, the wiring diagram may also include details on additional features such as wrinkle prevention, steam cycles, and remote control capabilities. By understanding these connections, technicians can troubleshoot and repair issues related to these advanced features, ensuring optimal performance and user satisfaction.
In summary, the “Advanced Features: Exploring additional functionalities and features enabled by the timer, as indicated in the wiring diagram” aspect of “Hotpoint Dryer Timer Wiring Diagram” provides valuable information for technicians and homeowners alike. It helps unlock the full potential of the dryer’s advanced features, ensuring efficient operation, tailored drying cycles, and enhanced user convenience.


Related Posts


