Arduino Servo Wiring connects an Arduino microcontroller to a servo motor, enabling precise control over its angular position. It involves establishing physical and electrical connections between the devices using appropriate wires, breadboards, or other components.
Arduino servo wiring is crucial in various applications, including robotics, automation, and animatronics. It allows users to control the movement of robotic arms, camera platforms, or other objects with accuracy and precision. The wiring process is relatively straightforward, with Arduino providing dedicated servo ports that simplify the setup.
This wiring technique has revolutionized project development in fields such as robotics and automation. It has made servo control accessible to hobbyists, students, and makers alike, enabling the creation of diverse projects with enhanced functionality and control. The article delves deeper into the details of Arduino servo wiring, explaining the wiring diagrams, connections, and programming techniques involved in using servos with Arduino.
Understanding the essential aspects of “Arduino Servo Wiring” is crucial to effectively harness its capabilities in various projects. These aspects encompass both the technical details of the wiring process and the broader context of its usage.
- Wiring Diagrams: Schematics that guide the physical connections between the Arduino, servo, and power source.
- Pin Connections: Specific pins on the Arduino designated for servo control, typically labeled “PWM” or “SERVO”.
- Power Requirements: Servos require an external power source, usually 4.8-6V, separate from the Arduino’s 5V supply.
- Servo Library: Arduino provides a dedicated library for servo control, simplifying programming and functionality.
- Angle Control: Servos can be commanded to rotate to specific angles within their range of motion.
- Speed and Acceleration: Some servos allow for control over their speed and acceleration, enabling smoother movements.
- Torque: Servos are characterized by their torque, which determines their ability to overcome opposing forces.
- Feedback: Certain servos provide feedback on their current position, enabling closed-loop control systems.
- Applications: Arduino servo wiring finds applications in robotics, automation, animatronics, and various projects requiring precise motor control.
These aspects collectively define the core concepts and considerations involved in Arduino servo wiring. Understanding and mastering these aspects empower users to effectively control and utilize servos in their projects.
Wiring Diagrams
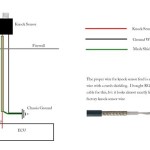
Wiring diagrams are essential for understanding and implementing Arduino servo wiring. They provide a visual representation of the electrical connections between the Arduino board, servo motor, and power source. These diagrams specify the specific pins on the Arduino that should be connected to the servo’s control and power inputs, as well as the connections to the external power supply.
Having accurate wiring diagrams is critical to ensure proper functionality and prevent damage to the Arduino or servo. The diagrams ensure that the servo is correctly powered and receives control signals from the Arduino. Without proper wiring, the servo may not operate correctly or may even be damaged by incorrect voltage or current levels.
Real-life examples of wiring diagrams for Arduino servo wiring can be found in various online resources, including the Arduino documentation and project tutorials. These diagrams typically include a schematic representation of the connections, as well as detailed instructions on how to make the physical connections.
Understanding wiring diagrams is essential for successfully implementing Arduino servo wiring in practical applications. It enables users to troubleshoot and modify their circuits as needed, ensuring reliable and effective servo control. Furthermore, a solid understanding of wiring diagrams is a valuable skill for anyone working with electronics and embedded systems.
In summary, wiring diagrams are critical components of Arduino servo wiring, providing a blueprint for the physical connections between the Arduino, servo, and power source. They are essential for ensuring proper functionality, preventing damage, and enabling effective servo control in various applications.
Pin Connections
Pin connections are critical components of Arduino servo wiring, determining the electrical interface between the Arduino board and the servo motor. Specific pins on the Arduino are designated for servo control, typically labeled “PWM” or “SERVO”. These pins provide the necessary control signals and power to operate the servo.
The Arduino servo library utilizes these designated pins to generate the pulse-width modulation (PWM) signals that control the servo’s position. PWM is a technique where the width of a pulsed signal determines the servo’s angular position. By varying the pulse width, the Arduino can command the servo to rotate to specific angles within its range of motion.
Real-life examples of pin connections in Arduino servo wiring can be found in numerous projects and tutorials. For instance, in a robotic arm application, the Arduino may have dedicated servo pins connected to servos controlling the arm’s joints. The Arduino code would then use the servo library to send PWM signals to each servo, controlling the arm’s movement.
Understanding pin connections is essential for successful Arduino servo wiring. It enables users to correctly interface the Arduino with the servo motors and utilize the servo library effectively. Incorrect pin connections can lead to malfunctioning servos or damage to the Arduino board.
In summary, pin connections are critical components of Arduino servo wiring, providing the electrical interface between the Arduino and servo motors. These designated pins allow the Arduino to control the servos’ position using PWM signals. Understanding pin connections is essential for successful implementation of Arduino servo wiring in various applications.
Power Requirements
In the context of “Arduino Servo Wiring,” understanding the power requirements of servos is crucial for ensuring their proper operation and longevity. Servos, unlike simple LEDs or sensors, necessitate an external power source to generate the necessary torque and movement. This external power source typically provides a voltage range of 4.8-6V, distinct from the Arduino’s 5V supply.
- Separate Power Supply: Servos require a dedicated power supply because the Arduino’s 5V supply is insufficient to meet their power demands. Using the Arduino’s 5V supply to power servos can overload the Arduino and potentially damage it.
- Voltage Range: Servos typically operate within a voltage range of 4.8-6V. Providing a voltage below this range may result in insufficient torque and movement, while exceeding this range can damage the servo.
- Current Draw: Servos can draw significant current, especially during startup and when under load. It is important to ensure that the power supply can provide sufficient current to meet the servo’s requirements.
- Real-Life Example: In a robotic arm project, each servo controlling the arm’s joints requires its own dedicated power supply. These power supplies provide the necessary voltage and current to ensure smooth and reliable movement of the arm.
Understanding and adhering to the power requirements of servos is essential for successful Arduino servo wiring. By providing an appropriate external power source, users can ensure that their servos operate as intended, with optimal performance and longevity.
Servo Library
Within the realm of “Arduino Servo Wiring,” the “Servo Library” stands as a cornerstone, providing an indispensable toolset that streamlines programming and expands functionality. This dedicated library, offered by Arduino, empowers users to harness the capabilities of servo motors with remarkable ease and efficiency.
- Simplified Control: The Servo Library abstracts the complexities of servo control, allowing users to command servos using intuitive functions. Instead of dealing with intricate low-level hardware details, programmers can focus on the high-level logic of their applications.
- Extensive Functionality: Beyond basic control, the Servo Library offers a range of advanced features. These include the ability to set servo speed and acceleration, read servo position, and attach multiple servos to a single Arduino.
- Real-Life Applications: In countless projects, the Servo Library has proven its mettle. From robotic arms to automated camera rigs, it empowers makers and hobbyists to bring their creations to life with precision and control.
- Community Support: The Servo Library benefits from a vibrant community of users and contributors. This community provides a wealth of documentation, tutorials, and examples, fostering a supportive environment for learning and troubleshooting.
The Servo Library is an indispensable asset for Arduino servo wiring, enabling users to tap into the full potential of servo motors. Its simplified control, extensive functionality, and robust community support make it an essential tool for anyone venturing into the world of servo-driven projects.
Angle Control
Within the realm of “Arduino Servo Wiring,” “Angle Control” emerges as a fundamental aspect, empowering users to precisely command the rotational position of servo motors. This capability unlocks a world of possibilities, enabling the creation of dynamic and responsive projects where servos serve as the driving force behind motion and control.
- Precision Positioning: Servos excel in applications demanding precise angular positioning. Whether it’s a robotic arm requiring pinpoint accuracy or a camera platform seeking smooth panning, servos deliver the necessary control to achieve desired orientations.
- Real-Life Examples: Angle control finds practical applications in countless projects. From animatronics to robotics, servos bring life to characters and enable complex movements in machines.
- Range of Motion: Servos typically operate within a specific range of motion, allowing them to rotate within predefined limits. This range can vary depending on the servo model and its mechanical construction.
- Software Control: Arduino’s servo library provides a comprehensive set of functions for angle control. Users can specify target angles, set servo speed, and even create complex motion sequences.
In summary, “Angle Control: Servos can be commanded to rotate to specific angles within their range of motion” is a cornerstone of “Arduino Servo Wiring.” It empowers users with the ability to precisely position and control servos, opening up a vast array of possibilities in robotics, automation, and other servo-driven applications.
Speed and Acceleration
In the context of “Arduino Servo Wiring,” “Speed and Acceleration” emerge as crucial factors that significantly enhance the performance and versatility of servo motors. By providing control over these parameters, servos can execute movements with greater precision, fluidity, and responsiveness.
The ability to control speed and acceleration is particularly important in applications where smooth and controlled motion is essential. Consider a robotic arm designed to perform delicate tasks, such as assembling electronic components. Precise control over the arm’s speed and acceleration ensures that components are handled with care, minimizing the risk of damage or misalignment.
Arduino’s servo library provides dedicated functions for setting the speed and acceleration of servos. These functions allow users to tailor the servo’s movement characteristics to match the specific requirements of their project. For instance, a servo controlling a camera platform can be programmed to accelerate smoothly, resulting in stable and cinematic camera movements.
In summary, “Speed and Acceleration: Some servos allow for control over their speed and acceleration, enabling smoother movements” is a critical aspect of “Arduino Servo Wiring” that empowers users to achieve refined and controlled motion in their projects. By harnessing the capabilities of servos to adjust speed and acceleration, users can create dynamic and responsive systems that meet the demands of various applications, ranging from robotics to automation and beyond.
Torque
In the realm of “Arduino Servo Wiring,” torque emerges as a defining characteristic of servos, shaping their ability to perform under various loads and operating conditions. Torque, measured in Newton-meters (Nm), quantifies the servo’s capacity to generate rotational force, enabling it to overcome opposing forces and maintain its desired position.
Understanding the relationship between torque and Arduino servo wiring is crucial for selecting and utilizing servos effectively. When choosing a servo for a specific application, the required torque must be carefully considered to ensure that the servo can handle the anticipated loads and perform as expected. For instance, a servo controlling a heavy robotic arm requires a higher torque rating compared to a servo used for a lightweight camera pan-tilt system.
Arduino’s servo library provides functions for setting the target position and controlling the servo’s movement. However, the servo’s torque capabilities ultimately determine its ability to achieve and maintain the desired position against external forces. In practical applications, understanding torque is essential for designing systems that can withstand external disturbances, operate reliably under varying loads, and achieve precise control over movement.
In summary, torque is a fundamental property of servos that directly influences their performance in Arduino-based projects. By comprehending the relationship between torque and Arduino servo wiring, users can make informed decisions when selecting servos, ensuring that their projects operate effectively and meet the desired performance criteria.
Feedback
Within the realm of “Arduino Servo Wiring,” the concept of feedback plays a crucial role in enhancing the precision and control of servo motors. Certain servos incorporate sensors that provide feedback on their current position, enabling the implementation of closed-loop control systems.
Closed-loop control systems utilize feedback mechanisms to monitor the actual output of a system and compare it to the desired output. Any discrepancies between the actual and desired outputs are then used to adjust the input, effectively reducing errors and improving overall system performance. In the context of Arduino servo wiring, feedback from the servo allows for precise control of its angular position.
Real-life applications of feedback in Arduino servo wiring can be found in various projects, including robotic arms and automated positioning systems. In a robotic arm, for instance, feedback from the servo ensures that the arm moves to the desired position accurately, even if there are external disturbances or variations in load.
Understanding the connection between feedback and Arduino servo wiring is essential for developing robust and high-performance systems. By incorporating feedback mechanisms, users can achieve greater precision, reduce errors, and enhance the overall reliability of their projects.
Applications
Arduino servo wiring is a fundamental technique that enables precise control of motors in various applications, including robotics, automation, and animatronics. The ability to accurately position and control motors is a critical component of many projects, and Arduino servo wiring provides a simple and effective way to achieve this.
One of the key benefits of using Arduino servo wiring is its versatility. Servos can be used in a wide range of projects, from simple robotic arms to complex automated systems. This versatility makes Arduino servo wiring an essential tool for makers and hobbyists who want to create projects that involve precise motor control.
For example, in robotics, Arduino servo wiring can be used to control the movement of robotic arms, legs, and other body parts. This allows robots to perform a wide range of tasks, from simple movements to complex maneuvers. In automation, Arduino servo wiring can be used to control the movement of conveyor belts, robotic arms, and other automated machinery. This can help to improve efficiency and productivity in a variety of industries.
In animatronics, Arduino servo wiring can be used to create realistic movements in puppets and other animated characters. This can bring characters to life and make them more engaging for audiences.
Understanding the connection between Arduino servo wiring and its applications is essential for anyone who wants to create projects that involve precise motor control. By understanding the capabilities of servos and how to use them effectively, makers and hobbyists can create a wide range of projects that are both functional and visually appealing.


Related Posts

