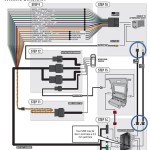
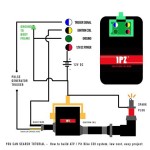
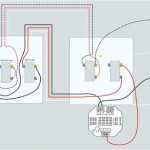
A Contactor Wiring Diagram is a schematic representation that outlines the electrical connections and components within a contactor system. A typical contactor wiring diagram shows the connections between the contactor, its coil, and the main circuit it controls. For instance, in an electric motor control system, the wiring diagram would detail how the contactor is wired to the motor, the power supply, and any additional control devices.
Contactor Wiring Diagrams are crucial for ensuring safe and efficient operation of contactor systems. They provide a visual guide for understanding the system’s configuration, which simplifies troubleshooting and maintenance. Historically, the development of computer-aided design (CAD) software played a key role in advancing contactor wiring diagrams by enabling the creation of more accurate and detailed representations.
This article delves into the comprehensive analysis of contactor wiring diagrams, exploring their essential elements, design principles, and practical applications in electrical systems.
The essential aspects of a contactor wiring diagram are crucial to understanding the operation and functionality of contactor systems. These aspects encompass various dimensions related to the diagram’s structure, components, and purpose.
- Components: Contactors, coils, terminals, wires.
- Connections: Power supply, motor, control devices.
- Layout: Physical arrangement of components and wires.
- Symbols: Graphical representations of components.
- Labels: Identification of wires, terminals, and components.
- Standards: Compliance with electrical codes and industry practices.
- Testing: Verification of proper wiring and system operation.
- Troubleshooting: Diagnosis of problems based on wiring diagram.
- Documentation: Reference for future maintenance and modifications.
These aspects are interconnected and collectively contribute to the effectiveness of the contactor wiring diagram as a communication tool and a guide for electrical system design, installation, and maintenance. Understanding these aspects provides a comprehensive grasp of contactor wiring diagrams, enabling professionals to work with them confidently and efficiently.
Components
In contactor wiring diagrams, the specific componentscontactors, coils, terminals, and wiresplay crucial roles in ensuring the proper functioning of electrical systems. Understanding their functions and interconnections is fundamental to mastering contactor wiring diagrams.
- Contactors: Electromagnetic switches that control the flow of electricity in main circuits. They are the heart of contactor systems, enabling the switching of high currents.
- Coils: Energize the contactor’s electromagnet, creating a magnetic field that closes or opens the main contacts.
- Terminals: Connection points for wires, allowing the flow of electricity between components.
- Wires: Conductors that establish electrical connections between the various components of the contactor system.
These components work together seamlessly to execute control functions in electrical systems. Contactors provide safe and reliable switching of high currents, while coils, terminals, and wires facilitate the electrical connections and signal transmission necessary for proper operation. Understanding the roles and interconnections of these components empowers professionals to design, install, and maintain contactor systems efficiently and effectively.
Connections
In contactor wiring diagrams, the connections between the power supply, motor, and control devices are crucial for establishing a functional electrical system. These connections define the pathways for electricity to flow, ensuring that the contactor can effectively control the motor and respond to control signals.
The connection to the power supply provides the electrical energy necessary to operate the contactor coil. When the coil is energized, it creates a magnetic field that closes the main contacts, allowing current to flow to the motor. The motor connection represents the load that the contactor is controlling. The control devices, such as push buttons, limit switches, or programmable logic controllers (PLCs), provide the signals to energize or de-energize the contactor coil, thereby controlling the motor’s operation.
Understanding these connections is vital for designing and troubleshooting contactor systems. Proper wiring ensures that the contactor operates safely and efficiently, preventing damage to the equipment or electrical hazards. For instance, incorrect wiring of the power supply can lead to electrical shocks or short circuits, while faulty connections to the motor can result in motor burnout. Accurate contactor wiring diagrams serve as a guide for electricians to establish these connections correctly, ensuring the reliable operation of electrical systems.
In summary, the connections between the power supply, motor, and control devices are fundamental aspects of contactor wiring diagrams. Understanding these connections enables professionals to design, install, and maintain contactor systems effectively, ensuring the safe and efficient operation of electrical equipment.
Layout
In contactor wiring diagrams, the layout, referring to the physical arrangement of components and wires, plays a crucial role in ensuring the diagram’s clarity and functionality. A well-organized layout enhances the diagram’s readability, making it easier to understand the system’s design and operation. It also facilitates troubleshooting and maintenance by providing a visual representation of the physical connections between components.
The layout of a contactor wiring diagram should be logical and intuitive, following established electrical standards and best practices. Components should be arranged in a way that reflects their functional relationships, with the main contactor typically positioned prominently in the center of the diagram. Wires should be routed neatly and labeled clearly to indicate their purpose and destination. Proper spacing between components and wires is essential to avoid clutter and ensure that the diagram is easy to follow.
Real-world examples of layout in contactor wiring diagrams can be found in various industrial and commercial applications. In a motor control system, the contactor wiring diagram would show the physical arrangement of the contactor, motor, push buttons, and other control devices. The layout should clearly indicate how these components are connected and how the system operates.
Understanding the relationship between layout and contactor wiring diagrams is essential for electrical professionals involved in the design, installation, and maintenance of electrical systems. A well-organized and accurate layout enables them to quickly identify and resolve issues, ensuring the safe and efficient operation of the system. Moreover, a clear and concise layout facilitates communication between electrical professionals, especially when working on complex systems involving multiple contractors and subcontractors.
Symbols
Symbols play a crucial role in contactor wiring diagrams, acting as a universal language that simplifies the representation and understanding of complex electrical systems. These graphical representations of components provide a visual shorthand, allowing professionals to quickly identify and interpret the function and interconnections of various components within the system. Symbols are essential for creating clear and concise diagrams that can be easily understood by individuals with varying levels of electrical expertise.
In contactor wiring diagrams, symbols are standardized according to industry best practices and electrical codes. This standardization ensures consistency and clarity across different diagrams, enabling professionals to work collaboratively and efficiently. Each symbol represents a specific electrical component, such as a contactor, coil, motor, or push button. The symbols are arranged in a logical manner, reflecting the physical layout and functional relationships between the components. Wires are represented by lines, and their connections to components are clearly indicated using standardized symbols for different types of connections, such as normally open or normally closed contacts.
Understanding the symbols used in contactor wiring diagrams is critical for electrical professionals involved in the design, installation, and maintenance of electrical systems. The ability to interpret these symbols enables them to quickly identify and troubleshoot issues, ensuring the safe and efficient operation of the system. Symbols facilitate communication between professionals, especially when working on complex systems involving multiple contractors and subcontractors. Accurate and consistent use of symbols ensures that all parties have a shared understanding of the system’s design and operation.
In summary, symbols are a critical component of contactor wiring diagrams, providing a graphical representation of components and their interconnections. Standardized symbols enhance the clarity and readability of diagrams, enabling professionals to quickly understand and work with electrical systems. The use of symbols promotes consistency and facilitates communication among electrical professionals, ensuring the safe and efficient operation of electrical systems.
Labels
Labels play a critical role in contactor wiring diagrams, providing essential information that aids in the installation, maintenance, and troubleshooting of electrical systems. These labels identify wires, terminals, and components, enabling professionals to quickly and accurately understand the system’s design and operation. Without proper labeling, contactor wiring diagrams would be difficult to decipher and prone to errors, potentially leading to safety hazards or system malfunctions.
Labels in contactor wiring diagrams are typically standardized according to industry best practices and electrical codes. This standardization ensures consistency and clarity across different diagrams, enabling professionals to work collaboratively and efficiently. Each label provides a unique identifier for a specific component or wire, allowing for easy referencing and troubleshooting. For instance, a contactor coil may be labeled with a unique number or letter, while wires are often labeled with their function or destination, such as “power supply” or “motor connection.”
Real-life examples of labels in contactor wiring diagrams can be found in various industrial and commercial applications. In a motor control system, the contactor wiring diagram would include labels for the contactor, motor, push buttons, and other control devices. These labels help identify the purpose and function of each component, simplifying the installation and maintenance process. Additionally, labels facilitate communication between electrical professionals, especially when working on complex systems involving multiple contractors and subcontractors.
Standards
In the realm of contactor wiring diagrams, adherence to established standards is paramount for ensuring electrical safety, system reliability, and compliance with regulatory requirements. These standards encompass various facets, each playing a critical role in the design, installation, and maintenance of contactor systems.
- Code Compliance: Contactor wiring diagrams must align with relevant electrical codes, such as the National Electrical Code (NEC) or local building codes. These codes provide specific guidelines for the installation and operation of electrical equipment, ensuring adherence to safety standards and minimizing electrical hazards.
- Industry Best Practices: Beyond code requirements, contactor wiring diagrams should also adhere to established industry best practices. These practices, developed through years of experience and research, provide additional guidance on optimal design principles, component selection, and installation techniques, further enhancing system reliability and safety.
- Component Standards: Contactors, coils, and other components used in contactor systems must meet recognized industry standards, such as those established by Underwriters Laboratories (UL) or the International Electrotechnical Commission (IEC). These standards define performance and safety requirements for electrical components, ensuring their suitability for use in contactor systems.
- Documentation and Labeling: Proper documentation and labeling are integral to standards compliance in contactor wiring diagrams. Clear and concise documentation, including schematics, component specifications, and test results, facilitates effective communication and knowledge transfer among electrical professionals involved in the system’s design, installation, and maintenance.
By adhering to these standards, contactor wiring diagrams serve as accurate and reliable blueprints for electrical systems, ensuring the safety and efficiency of electrical installations. Compliance with standards minimizes the risk of electrical accidents, reduces downtime, and enhances overall system performance.
Testing
In the domain of contactor wiring diagrams, testing plays a pivotal role in ensuring the accuracy and reliability of electrical systems. Testing involves a series of procedures designed to verify the proper wiring and operation of the system, mitigating potential hazards and ensuring optimal performance. Without thorough testing, contactor wiring diagrams remain mere theoretical representations, lacking the practical validation necessary for safe and efficient electrical installations.
The connection between testing and contactor wiring diagrams is inherently cause-and-effect. A meticulously crafted contactor wiring diagram provides a roadmap for the electrical system’s construction, but it is the testing process that breathes life into the diagram, transforming it from a blueprint into a working system. Testing confirms that the wiring conforms to the diagram’s specifications and that the system operates as intended, delivering the desired functionality and adhering to safety standards.
In real-world applications, testing is an indispensable component of contactor wiring diagrams. Consider the example of an industrial motor control system. The contactor wiring diagram outlines the electrical connections and components involved in controlling the motor’s operation. However, it is only through testing that the electrician can verify the accuracy of the wiring, ensuring that the motor starts, stops, and operates in accordance with the system’s design parameters.
The practical significance of this understanding extends beyond individual systems to encompass the broader realm of electrical safety and reliability. Accurate contactor wiring diagrams, coupled with rigorous testing, minimize the risk of electrical accidents, system malfunctions, and costly downtime. They empower electrical professionals to design, install, and maintain electrical systems with confidence, knowing that the systems will operate as intended and meet the required safety standards.
In conclusion, testing is not merely an optional step in the process of contactor wiring diagrams; it is an essential component that transforms theoretical designs into practical realities. By verifying the proper wiring and system operation, testing ensures the safety, reliability, and optimal performance of electrical systems, making it an indispensable aspect of electrical engineering and maintenance.
Troubleshooting
Within the realm of contactor wiring diagrams, troubleshooting stands as a crucial aspect, empowering electrical professionals to identify and resolve issues within electrical systems. By leveraging the visual representation provided by the wiring diagram, troubleshooting enables the systematic diagnosis of problems, minimizing downtime and ensuring the efficient operation of electrical equipment.
- Identifying Faulty Components: Wiring diagrams serve as valuable diagnostic tools, allowing electricians to pinpoint faulty components based on the observed symptoms and the logical flow of electricity through the system.
- Real-Life Examples: Consider a scenario where a motor controlled by a contactor fails to operate. By analyzing the wiring diagram, the electrician can systematically check the power supply, contactor coil, and motor connections, identifying the faulty component for replacement.
- Implications for Safety: Accurate wiring diagrams are essential for safe troubleshooting, ensuring that electrical professionals can isolate and repair faults without exposing themselves or others to electrical hazards.
- Enhancing System Reliability: Effective troubleshooting based on wiring diagrams contributes to the overall reliability of electrical systems, reducing the likelihood of unplanned outages and costly repairs.
In conclusion, troubleshooting is an integral aspect of contactor wiring diagrams, empowering electricians with the ability to diagnose problems, identify faulty components, and restore electrical systems to optimal operation. Accurate and comprehensive wiring diagrams serve as invaluable tools for troubleshooting, ensuring the safety, reliability, and efficiency of electrical installations.
Documentation
Within the realm of “Contactor Wiring Diagram,” documentation plays a crucial role in ensuring the long-term integrity and efficiency of electrical systems. By providing a comprehensive reference point for future maintenance and modifications, accurate and detailed documentation streamlines troubleshooting, facilitates upgrades, and enhances overall system reliability.
- Maintenance Records: Detailed records of maintenance activities, including dates, tasks performed, and materials used, create a valuable history of the system’s operation and service interventions.
- Component Specifications: Documentation of component specifications, such as manufacturer, model number, and technical parameters, enables quick identification and sourcing of replacement parts when needed.
- Modification History: A clear record of system modifications, including the reasons for the changes and the dates they were implemented, provides a chronological account of the system’s evolution.
- Safety Instructions: Comprehensive safety instructions specific to the contactor wiring system, including potential hazards, precautions, and emergency procedures, ensure the safety of personnel performing maintenance and modifications.
In summary, the documentation aspect of “Contactor Wiring Diagram” serves as an invaluable reference for future maintenance and modifications, enhancing system reliability, streamlining troubleshooting, and ensuring the safety of electrical professionals. Accurate and up-to-date documentation empowers electricians and maintenance personnel with the knowledge and resources they need to keep electrical systems operating at optimal performance throughout their lifespan.


Related Posts


