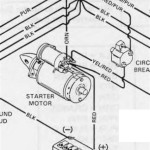
A Dual Battery Switch Wiring Diagram illustrates the electrical wiring connections between a vehicle’s starting battery and a secondary battery, typically used for powering accessories, camping equipment, or marine electronics. It specifies the proper arrangement of wires, fuses, and switches to ensure safe and efficient operation.
Dual battery systems enhance electrical capacity, allowing for extended use of accessories without draining the primary starting battery. They are particularly valuable in situations where multiple devices need to operate simultaneously, such as off-roading, extended camping, or boating. The wiring diagram ensures that the batteries are properly isolated, preventing accidental discharge and protecting sensitive electronics.
Historically, dual battery systems were implemented using complicated manual switches. However, advancements in technology have introduced sophisticated battery management systems that automatically monitor and control battery charging and isolation, further enhancing the system’s reliability and performance. This article will delve into the intricacies of Dual Battery Switch Wiring Diagrams, explaining their essential components, installation procedures, and troubleshooting tips.
The key aspects of a Dual Battery Switch Wiring Diagram are crucial for understanding its functionality and ensuring a safe and efficient electrical system. These aspects encompass various dimensions related to the design, installation, and operation of the system.
- Battery Selection: Choosing the right batteries for the system, considering capacity, type, and compatibility.
- Wiring Gauge: Determining the appropriate wire size to handle the electrical load and minimize voltage drop.
- Fusing: Installing fuses to protect the system from overcurrent and electrical faults.
- Switch Type: Selecting the right type of switch, such as manual, automatic, or battery isolator, based on the system requirements.
- Charging System: Understanding how the charging system interacts with the dual battery setup, including alternator output and voltage regulation.
- Isolation: Ensuring proper isolation between the starting battery and the secondary battery to prevent accidental discharge.
- Grounding: Establishing proper grounding connections for both batteries and electrical components.
- Monitoring: Implementing monitoring devices, such as battery gauges or voltage meters, to track battery status and system performance.
These aspects are interconnected and play a vital role in the overall effectiveness and safety of the dual battery system. Understanding and considering each aspect during the design and installation process is essential to ensure a reliable and efficient electrical system.
Battery Selection
In the context of Dual Battery Switch Wiring Diagrams, battery selection plays a pivotal role in determining the system’s overall performance and reliability. The type, capacity, and compatibility of the batteries directly influence the wiring diagram’s design and the system’s functionality.
The primary consideration is the battery’s capacity, measured in amp-hours (Ah). This determines how long the battery can power accessories or appliances before needing to be recharged. The capacity should be carefully matched to the expected electrical load to ensure sufficient runtime. For instance, a system powering a refrigerator and multiple lights may require a battery with a higher capacity than one powering only a few USB devices.
The battery’s type also affects the wiring diagram. Common types include lead-acid, AGM, and lithium-ion batteries, each with unique charging characteristics and voltage profiles. The wiring diagram must account for these differences to ensure proper charging and prevent damage to the batteries. Compatibility with the charging system is also crucial. The alternator and voltage regulator must be capable of charging both the starting battery and the secondary battery without overcharging or undercharging either one.
Selecting the right batteries and incorporating them into the Dual Battery Switch Wiring Diagram is essential for a well-functioning electrical system. It ensures optimal performance, extends battery life, and prevents potential electrical issues. Understanding this relationship empowers individuals to design and install dual battery systems that meet their specific needs and requirements.
Wiring Gauge
In the realm of Dual Battery Switch Wiring Diagrams, wiring gauge holds significant importance as it directly influences the system’s performance and efficiency. Selecting the appropriate wire size ensures that electrical current can flow effectively, minimizing voltage drop and preventing potential issues such as overheating or power loss.
- Current Capacity: The wire gauge must be adequate to handle the maximum current draw of the connected devices. Exceeding the current capacity of the wire can lead to overheating and safety hazards.
- Voltage Drop: Thinner wires have higher resistance, resulting in increased voltage drop over longer distances. Choosing a thicker gauge wire minimizes voltage drop, ensuring that devices receive the necessary voltage to operate properly.
- Wire Type: Different types of wire have varying resistance characteristics. For instance, copper wire has lower resistance compared to aluminum wire, making it a preferred choice for dual battery systems.
- Installation Environment: Factors such as ambient temperature, exposure to moisture, and potential mechanical stress should be considered when selecting the wire gauge. Harsh environments may require thicker gauge wire or additional protection.
Understanding and applying the principles of wiring gauge in Dual Battery Switch Wiring Diagrams is crucial for a safe and efficient electrical system. By carefully considering the current draw, voltage drop, wire type, and installation environment, individuals can ensure that the wiring can handle the electrical load effectively, minimize power loss, and prevent potential problems.
Fusing
In the realm of Dual Battery Switch Wiring Diagrams, fusing plays a crucial role in safeguarding the electrical system from potential hazards. Fuses serve as protective devices, interrupting the flow of excessive current in the event of an electrical fault or overload, preventing damage to sensitive components and minimizing the risk of fire or electrical shock.
- Fuse Types: Various types of fuses are utilized in dual battery systems, such as blade fuses, glass fuses, and resettable fuses. Each type has unique characteristics, current ratings, and applications, and selecting the appropriate fuse is essential.
- Fuse Placement: Fuses should be strategically placed in the wiring diagram to protect specific components or circuits. Common locations include near the battery terminals, in-line with high-current devices, and within the charging circuit.
- Fuse Rating: The current rating of a fuse determines its ability to handle electrical current safely. The fuse rating should be carefully chosen based on the maximum current draw of the protected circuit or device.
- Fuse Monitoring: Regularly monitoring and inspecting fuses is crucial to ensure they are functioning correctly. Blown or damaged fuses should be promptly replaced to maintain system protection.
Incorporating proper fusing into Dual Battery Switch Wiring Diagrams is paramount for ensuring electrical safety and preventing catastrophic failures. By understanding the types, placement, rating, and monitoring of fuses, individuals can create reliable and protected dual battery systems that operate optimally.
Switch Type
In the realm of Dual Battery Switch Wiring Diagrams, the selection of an appropriate switch type is paramount as it directly impacts the functionality, safety, and convenience of the system. The type of switch used determines how the batteries are connected, isolated, and managed within the electrical system.
Manual Switches: Manual switches require manual operation to connect or isolate the batteries. They provide a simple and cost-effective solution, but they require user intervention to manage the battery configuration. Manual switches are commonly used in basic dual battery setups where occasional battery isolation is desired.
Automatic Switches: Automatic switches, also known as voltage-sensitive relays (VSRs), monitor the voltage levels of both batteries and automatically connect or isolate them based on predefined voltage thresholds. This ensures that the secondary battery is charged when the starting battery is running and isolates it when the starting battery voltage drops, preventing excessive discharge. Automatic switches offer convenience and protection against battery drain.
Battery Isolators: Battery isolators are advanced switches that combine the functionality of manual and automatic switches. They allow for manual battery isolation while also incorporating voltage-sensitive circuitry to automatically connect the batteries when necessary. Battery isolators provide both manual control and automatic protection, making them a popular choice for more complex dual battery systems.
Understanding the different switch types and their applications is crucial for designing effective Dual Battery Switch Wiring Diagrams. The choice of switch depends on factors such as the desired level of automation, system complexity, and user preferences. Proper switch selection ensures optimal battery management, prevents electrical issues, and enhances the overall performance of the dual battery system.
Charging System
Within the context of Dual Battery Switch Wiring Diagrams, the charging system plays a critical role in maintaining the proper operation and functionality of the dual battery setup. The charging system ensures that both the starting battery and the secondary battery are adequately charged to meet the electrical demands of the vehicle and its accessories.
- Alternator Output: The alternator is responsible for generating electrical power and recharging the batteries while the engine is running. Understanding the alternator’s output, including its capacity and efficiency, is crucial for designing a charging system that can effectively handle the electrical load of the dual battery setup.
- Voltage Regulation: The voltage regulator plays a vital role in controlling the alternator’s output voltage to prevent overcharging or undercharging of the batteries. Proper voltage regulation ensures that the batteries receive the correct voltage for optimal performance and longevity.
- Battery Isolation: The charging system must include provisions to isolate the starting battery from the secondary battery during charging to prevent the starting battery from being discharged by the secondary battery’s loads.
- Monitoring and Control: The charging system may incorporate monitoring and control devices, such as battery management systems (BMS), to optimize charging efficiency, protect the batteries from overcharging or over-discharging, and provide system diagnostics.
Understanding the charging system and its interaction with the dual battery setup is essential for designing and implementing an effective Dual Battery Switch Wiring Diagram. Proper consideration of these factors ensures that the charging system can adequately support the electrical demands of the system, maintain battery health, and prevent potential electrical issues.
Isolation
Within the context of Dual Battery Switch Wiring Diagrams, battery isolation plays a crucial role in maintaining the integrity and functionality of the electrical system. Isolation ensures that the starting battery, which is responsible for starting the vehicle, remains isolated from the secondary battery, which powers accessories and devices. This separation prevents accidental discharge of the starting battery by the secondary battery’s loads, ensuring that the vehicle can be started reliably.
In Dual Battery Switch Wiring Diagrams, isolation is achieved through various methods, including the use of diodes, relays, or battery isolators. Diodes allow current to flow in only one direction, preventing the secondary battery from discharging the starting battery. Relays are electronically controlled switches that can be used to isolate the batteries when the engine is not running. Battery isolators combine the functionality of diodes and relays, providing both automatic and manual isolation.
Real-life examples of battery isolation in Dual Battery Switch Wiring Diagrams can be found in various applications, including recreational vehicles, marine vessels, and off-grid power systems. In RVs, battery isolation ensures that the house battery, which powers appliances and lights, does not drain the starting battery when the vehicle is parked. On boats, battery isolation prevents the auxiliary battery, which powers electronics and equipment, from discharging the starting battery when the engine is off. In off-grid power systems, battery isolation ensures that the backup battery, which provides power during outages, does not discharge the primary battery when the grid is available.
Understanding the importance of battery isolation in Dual Battery Switch Wiring Diagrams is crucial for designing and implementing a reliable and efficient electrical system. Proper isolation prevents accidental discharge of the starting battery, ensuring that the vehicle or system can be started or powered when needed. It also protects the starting battery from excessive discharge, which can lead to reduced battery life and premature failure.
Grounding
Grounding, a crucial aspect of Dual Battery Switch Wiring Diagrams, ensures a safe and reliable electrical system by providing a common reference point for electrical circuits. Proper grounding connections minimize voltage fluctuations, reduce electrical noise, and protect components from damage.
- Battery Grounding: Connecting the negative terminals of both batteries to a common grounding point establishes a stable reference for electrical circuits. This prevents voltage imbalances and ensures proper operation of electrical components.
- Chassis Grounding: Grounding the vehicle’s chassis provides a low-resistance path for electrical current to return to the negative terminal of the battery. This enhances electrical safety by preventing stray currents from flowing through unintended paths.
- Component Grounding: Grounding individual electrical components, such as lights, switches, and appliances, ensures that they have a defined reference point for electrical current. This minimizes electrical noise and improves component reliability.
- Grounding Wire Selection: Using appropriately sized grounding wires is essential. Thicker wires reduce resistance and ensure efficient current flow, preventing voltage drops and potential electrical issues.
Proper grounding connections are vital for the safe and effective operation of Dual Battery Switch Wiring Diagrams. By understanding the principles and components of grounding, individuals can design and implement reliable electrical systems that minimize electrical hazards, improve component performance, and enhance overall system longevity.
Monitoring
In the realm of Dual Battery Switch Wiring Diagrams, monitoring plays a crucial role in ensuring the optimal performance and longevity of the electrical system. Monitoring devices, such as battery gauges or voltage meters, provide valuable insights into the status of the batteries and the overall health of the system, allowing for timely intervention and maintenance.
- Battery Gauges: Battery gauges indicate the charge level of the batteries, enabling users to monitor their capacity and avoid deep discharge or overcharging. They can be analog or digital, providing a visual representation of the battery’s state.
- Voltage Meters: Voltage meters measure the electrical potential of the batteries and the charging system. Monitoring voltage levels helps identify potential issues, such as overcharging, undercharging, or excessive voltage drop, allowing for early detection and rectification.
- Battery Management Systems (BMS): BMSs are sophisticated monitoring devices that not only measure voltage and current but also perform advanced functions such as cell balancing, temperature monitoring, and charge control. They provide comprehensive insights into battery health and system performance.
- Remote Monitoring: Wireless monitoring systems allow users to remotely track battery status and system performance using smartphones or other devices. This enables remote monitoring of multiple batteries and systems, simplifying maintenance and troubleshooting.
Monitoring devices are essential components of Dual Battery Switch Wiring Diagrams, providing valuable information that helps maintain optimal battery performance, prevent system failures, and extend the lifespan of the electrical system. By incorporating monitoring into their designs, individuals can ensure reliable and efficient operation of their dual battery systems.


Related Posts

