Wiring Guitar Output Jack involves connecting a guitar’s internal electrical components to an output jack, allowing the instrument to send its signal to an amplifier or other audio equipment. An example of wiring an output jack would be connecting a switchcraft 1/4-inch mono output jack to the body of a Fender Stratocaster guitar, which enables the guitar’s electrical output to be sent to an amplifier.
Wiring a guitar output jack is crucial for proper guitar functionality, allowing for amplification and sound projection. It ensures efficient signal transfer from the guitar’s pickups to an amplifier or recording system, providing a clean and clear sound. A pivotal development in guitar history was the advent of the “jack plug,” which standardized the connection between guitars and amplifiers, streamlining the wiring process and enhancing signal quality.
This comprehensive article will delve into the intricate details of wiring a guitar output jack, exploring the necessary tools, materials, and step-by-step instructions. We will also examine advanced wiring techniques and troubleshoot potential issues, providing guitarists with the knowledge and expertise to maintain and modify their instruments effectively.
Wiring a guitar output jack is a crucial aspect of guitar maintenance and modification, involving the connection of a guitar’s internal electrical components to an output jack. Understanding the key aspects of wiring a guitar output jack is essential for ensuring proper guitar functionality and achieving the desired sound quality.
- Components: Output jack, wires, solder, soldering iron
- Tools: Wire strippers, pliers, screwdriver
- Types: Mono vs. stereo output jacks
- Placement: Location of the output jack on the guitar body
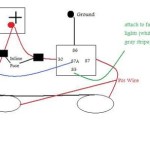
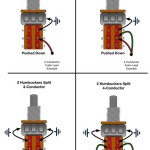
- Wiring: Soldering the wires to the output jack and guitar components
- Grounding: Proper grounding to minimize electrical noise
- Shielding: Shielding the output jack cavity to prevent electromagnetic interference
- Testing: Ensuring proper electrical continuity and sound output
- Maintenance: Regular cleaning and inspection of the output jack
- Modification: Swapping output jacks for different types or upgrading to higher-quality jacks
These aspects are interconnected and play vital roles in the overall functionality and sound quality of a guitar. Proper wiring ensures efficient signal transfer from the guitar’s pickups to an amplifier, minimizing noise and maintaining a clear and consistent sound. Regular maintenance and occasional modifications can enhance the guitar’s performance and longevity.
Components
When it comes to wiring a guitar output jack, the right components are essential for ensuring a strong and reliable connection. These components include the output jack itself, wires, solder, and a soldering iron.
- Output jack: The output jack is the socket on the guitar’s body where the instrument cable is plugged in. It is responsible for transmitting the guitar’s electrical signal to an amplifier or other audio equipment. Output jacks come in different types, including mono and stereo jacks, and choosing the right type is important for compatibility with the guitar’s electronics and the intended use.
- Wires: Wires are used to connect the output jack to the guitar’s internal electronics, such as the pickups, volume and tone controls, and ground. The thickness and type of wire used can affect the sound quality and overall performance of the guitar.
- Solder: Solder is a metal alloy that is used to create a strong electrical connection between the wires and the output jack. Choosing the right type of solder and using proper soldering techniques is crucial for ensuring a reliable and long-lasting connection.
- Soldering iron: A soldering iron is a heated tool used to melt solder and create the electrical connections. The wattage and tip size of the soldering iron should be appropriate for the job, and using the correct techniques is essential for avoiding damage to the components or the guitar itself.
Understanding the role and proper use of these components is essential for successful wiring of a guitar output jack. By carefully selecting and using the right components and following proper wiring techniques, guitarists can ensure optimal performance and sound quality from their instruments.
Tools
In the realm of wiring a guitar output jack, the right tools are indispensable, ensuring a precise and secure connection. These tools include wire strippers, pliers, and screwdrivers, each playing a distinct role in the process.
- Wire strippers: These specialized pliers are designed to remove insulation from wires without damaging the conductors. This is crucial for creating clean and reliable electrical connections.
- Pliers: Pliers are used for bending and shaping wires, as well as cutting them to the desired length. Needle-nose pliers are particularly useful for working in tight spaces.
- Screwdriver: A screwdriver is used to tighten and loosen screws that secure the output jack to the guitar body and connect the wires to the jack’s terminals. Using the correct screwdriver size is essential to avoid damaging the screws or the guitar’s finish.
- Additional tools: In some cases, additional tools such as a soldering iron, solder, and heat shrink tubing may also be needed, depending on the type of output jack and the desired wiring method.
By employing the appropriate tools and techniques, guitarists can ensure that their output jack is securely and reliably connected, providing optimal signal transfer and maintaining the guitar’s overall performance and sound quality.
Types
Choosing between mono and stereo output jacks is a fundamental decision when wiring a guitar output jack, affecting the sound quality, versatility, and overall functionality of the instrument. Here’s a closer look at the key differences and considerations:
- Number of conductors: Mono jacks have two conductors (tip and sleeve), while stereo jacks have three (tip, ring, and sleeve). This difference determines the number of audio signals that can be transmitted.
- Audio channels: Mono jacks transmit a single audio signal, resulting in a mono sound output. Stereo jacks can transmit two separate audio signals, allowing for stereo sound output and effects like panning.
- Compatibility: Mono jacks are compatible with both mono and stereo setups, while stereo jacks require a stereo amplifier or sound system to take advantage of their full capabilities.
- Applications: Mono jacks are commonly used on guitars with a single pickup, while stereo jacks are often preferred for guitars with multiple pickups or for creating stereo effects.
Understanding the differences between mono and stereo output jacks is essential for making an informed decision when wiring a guitar output jack. By considering the number of audio signals, desired sound output, compatibility requirements, and intended applications, guitarists can choose the right type of output jack to optimize the performance and sound quality of their instrument.
Placement
When wiring a guitar output jack, the placement of the jack on the guitar body is a crucial consideration that affects the instrument’s ergonomics, accessibility, and overall functionality. Here are four key aspects to consider:
- Accessibility: The output jack should be placed in a location that allows for easy access when plugging in and unplugging the instrument cable. This typically involves placing the jack near the edge of the guitar body, often in the lower bout area.
- Comfort: The placement of the output jack should not interfere with the player’s strumming or picking hand. It should be positioned in a way that allows for comfortable and unrestricted movement while playing.
- Balance: The weight of the output jack and the attached cable can affect the balance of the guitar. Placing the jack in a balanced location helps prevent the guitar from neck diving or becoming unbalanced when played.
- Aesthetics: The location of the output jack can also impact the guitar’s aesthetics. Some players prefer a more traditional look with the jack placed on the top or side of the body, while others may opt for a more modern look with the jack recessed into the body or placed in a unique location.
By carefully considering the placement of the output jack, guitarists can ensure that their instrument is both functional and aesthetically pleasing. Proper placement contributes to a comfortable playing experience, efficient cable management, and a balanced overall design.
Wiring
In the realm of wiring a guitar output jack, soldering the wires to the output jack and guitar components is a critical step that ensures a strong and reliable electrical connection. This intricate process involves meticulously attaching the wires to the designated terminals on the output jack and guitar components, such as the pickups and volume controls, using solder and a soldering iron.
The precision and skill required in soldering these connections directly impact the overall functionality and sound quality of the guitar. Properly soldered joints create a seamless electrical pathway, allowing the guitar’s electrical signals to flow efficiently from the pickups to the output jack and ultimately to the amplifier. Conversely, poorly soldered joints can result in intermittent connections, noise, or even complete signal loss.
Real-life examples of this connection abound in the world of guitar maintenance and repair. A common scenario involves replacing a worn-out or damaged output jack. The new jack must be carefully soldered to the existing wires, ensuring a secure and reliable connection. Another example is upgrading the guitar’s electronics, such as installing new pickups or a preamp. In these situations, the new components must be meticulously soldered into the circuit, taking into account the specific wiring scheme and component values.
Understanding the connection between wiring, soldering, and guitar output jack functionality is essential for guitarists who wish to maintain, modify, or build their own instruments. By mastering the techniques of soldering and wiring, guitarists can ensure that their instruments perform at their optimal level, producing the desired sound and playing experience.
Grounding
When discussing the topic of “Wiring Guitar Output Jack,” the significance of “Grounding: Proper grounding to minimize electrical noise” cannot be overstated. Grounding plays a crucial role in ensuring a clean and noise-free signal path, which is essential for achieving optimal sound quality and performance from your guitar.
Electrical noise in guitars primarily originates from external sources such as electromagnetic interference (EMI) and radio frequency interference (RFI). These interferences can manifest as unwanted hum, buzz, or crackle in the guitar’s output signal. Proper grounding provides a low-resistance path for these stray electrical currents to flow back to the power source, effectively minimizing their impact on the guitar’s signal.
In the context of “Wiring Guitar Output Jack,” grounding is achieved by connecting the ground wire from the output jack to the guitar’s bridge, which is typically made of metal and provides a good electrical connection to the ground plane. This connection creates a complete circuit, allowing the stray electrical currents to flow through the ground wire and back to the power source. Real-life examples of grounding in “Wiring Guitar Output Jack” include shielding the guitar’s pickup cavities and control cavities with conductive materials, such as copper tape or conductive paint, to minimize EMI and RFI.
Understanding the connection between “Grounding: Proper grounding to minimize electrical noise” and “Wiring Guitar Output Jack” is essential for guitarists who wish to maintain, modify, or build their own instruments. By ensuring proper grounding, guitarists can effectively reduce electrical noise, resulting in a cleaner and more desirable sound quality. This understanding is also applicable to other electrical and electronic systems, where proper grounding is crucial for ensuring optimal performance and minimizing noise interference.
Shielding
When discussing the topic of “Wiring Guitar Output Jack” for an “informatical article,” it is imperative to explore the connection between “Shielding: Shielding the output jack cavity to prevent electromagnetic interference” and the overall process. Shielding plays a crucial role in ensuring a clean and noise-free signal path, which is essential for achieving optimal sound quality and performance from your guitar.
Electromagnetic interference (EMI) is a major source of electrical noise in guitars. EMI can originate from various sources, such as power lines, fluorescent lights, and even other electronic devices. When EMI affects the guitar’s signal, it can manifest as unwanted hum, buzz, or crackle in the output. Shielding the output jack cavity is a critical component of “Wiring Guitar Output Jack” because it helps to minimize the impact of EMI on the guitar’s signal.
Real-life examples of “Shielding: Shielding the output jack cavity to prevent electromagnetic interference” within “Wiring Guitar Output Jack” include using conductive paint or copper tape to line the inside of the output jack cavity. This creates a Faraday cage effect, which helps to block out EMI and reduce noise. Additionally, using shielded cables and connectors throughout the guitar’s wiring can further minimize the effects of EMI.
Understanding the connection between “Shielding: Shielding the output jack cavity to prevent electromagnetic interference” and “Wiring Guitar Output Jack” is essential for guitarists who wish to maintain, modify, or build their own instruments. By ensuring proper shielding, guitarists can effectively reduce electrical noise, resulting in a cleaner and more desirable sound quality. This understanding is also applicable to other electrical and electronic systems, where proper shielding is crucial for ensuring optimal performance and minimizing noise interference.
Testing
In the realm of “Wiring Guitar Output Jack” for an “informatical article,” the significance of “Testing: Ensuring proper electrical continuity and sound output” cannot be understated. Testing plays a pivotal role in verifying the functionality and integrity of the newly wired output jack, guaranteeing that the guitar’s electrical signals are transmitted efficiently and without any issues.
Proper electrical continuity is essential for establishing a complete circuit between the guitar’s components and the output jack. This continuity ensures that the electrical signals generated by the pickups can flow unimpeded to the jack and subsequently to the amplifier. Without proper continuity, the guitar’s sound output will be compromised, resulting in weak or intermittent signals.
Real-life examples of “Testing: Ensuring proper electrical continuity and sound output” within “Wiring Guitar Output Jack” include using a multimeter to check for continuity between the output jack terminals and the corresponding guitar components, such as the pickups, volume controls, and ground wire. Additionally, plugging the guitar into an amplifier and listening for clear and consistent sound output is a crucial test to assess the effectiveness of the wiring.
Understanding the connection between “Testing: Ensuring proper electrical continuity and sound output” and “Wiring Guitar Output Jack” empowers guitarists to troubleshoot and resolve any issues that may arise during the wiring process. By performing these tests, guitarists can identify and rectify any breaks or faulty connections, ensuring that their guitar performs optimally and delivers the desired sound quality.
Maintenance
In the realm of “Wiring Guitar Output Jack” for an “informatical article,” the significance of “Maintenance: Regular cleaning and inspection of the output jack” cannot be overstated. Regular maintenance is crucial for ensuring the long-term functionality and reliability of the output jack, a pivotal component in transmitting the guitar’s electrical signals to an amplifier.
Neglecting proper maintenance can lead to a myriad of issues that can compromise the guitar’s performance. Dust, dirt, and moisture can accumulate within the output jack cavity over time, causing corrosion and impairing electrical connections. This can result in intermittent sound output, crackling noises, or even complete signal loss.
Real-life examples of “Maintenance: Regular cleaning and inspection of the output jack” within “Wiring Guitar Output Jack” include periodically wiping down the jack with a clean cloth to remove dust and debris, using compressed air to blow out any loose particles, and inspecting the jack for any signs of damage or wear. Additionally, periodically tightening the jack’s mounting screws can help prevent the jack from becoming loose and causing poor connections.
Understanding the connection between “Maintenance: Regular cleaning and inspection of the output jack” and “Wiring Guitar Output Jack” empowers guitarists to proactively maintain their instruments, avoiding potential problems and extending the lifespan of the output jack. By incorporating regular maintenance into their guitar care routine, guitarists can ensure that their instruments perform optimally and deliver the desired sound quality.
Modification
In the realm of “Wiring Guitar Output Jack” for an “informatical article,” the significance of “Modification: Swapping output jacks for different types or upgrading to higher-quality jacks” cannot be understated. Modification plays a crucial role in customizing the guitar’s sound output and enhancing its overall performance, making it an integral part of the “Wiring Guitar Output Jack” process.
Swapping output jacks offers guitarists the flexibility to alter the type of output jack used, such as switching from a mono to a stereo jack, or upgrading to a higher-quality jack with better materials and construction. This modification can directly impact the guitar’s sound quality, allowing guitarists to tailor the output to their specific preferences and the demands of their playing style. Additionally, upgrading to a higher-quality jack can improve durability and reliability, ensuring a consistent and dependable connection over an extended period.
Real-life examples of “Modification: Swapping output jacks for different types or upgrading to higher-quality jacks” within “Wiring Guitar Output Jack” include replacing a standard 1/4-inch mono jack with a locking jack to prevent accidental disconnections, or installing a high-quality gold-plated jack for improved signal transfer and reduced noise. These modifications are not only beneficial for professional guitarists but also for enthusiasts seeking to enhance their instrument’s performance and sound.
Understanding the connection between “Modification: Swapping output jacks for different types or upgrading to higher-quality jacks” and “Wiring Guitar Output Jack” empowers guitarists to make informed decisions about customizing their instruments. By exploring the various types of output jacks available and considering the potential benefits of upgrading, guitarists can optimize their guitar’s sound quality, reliability, and overall playing experience.


Related Posts

